The ${WebMake.*} Magic Variables - information about the environment WebMake is run in, such as the version of WebMake, the timestamp, the user who ran it, etc.
WebMake is a simple content management system, based around a templating
system for HTML documents, with lots of built-in smarts about what a
"typical" informational website needs in the way of functionality; metadata,
sitemapping, navigational aids, and (of course) embedded perl code. ;)
Creates portable sites: It requires no dynamic scripting capabilities
on the server; WebMake sites can be deployed to a plain old FTP site
without any problems.
No need to edit lots of files: A multi-level website can be generated
entirely from 1 WebMake file containing content, links to content files,
perl code (if needed), and output instructions.
Useful for team work: Since the file-to-page mapping is no longer
required, WebMake allows the separation of responsibilities between the
content editors, the HTML page designers, and the site architect. Only the
site architect needs to edit the WebMake file itself, or know perl or
WebMake code. Standard file access permissions can be used to restrict
editing by role.
Efficient: WebMake supports dependency checking, so a one-line change
to one source file will not regenerate your entire site -- unless it's
supposed to. Only the files that refer to that chunk of content, however
indirectly, will be modified.
Supports content conversion, on the fly: Text can be edited as
standard HTML, converted from plain text (see below), or converted from
any other format by adding a conversion method to the
WebMake::FormatConvert module.
Edit text as text, not as HTML: One of the built-in content conversion
modules is Text::EtText, which provides an easy-to-edit,
easy-to-read and intuitive way to write HTML, based on the plain-text
markup conventions we've been using for years.
Rearrange your site in 30 seconds: Since URLs can be referred to
symbolically, pages can be moved around and URLs changed by changing just
one line. All references to that URL will then change automatically. This
is vaguely Xanalogical.
Scriptable: Content items and output URLs can be generated, altered,
or read in dynamically using perl code. Perl code can even be used to
generate other perl code to generate content/output URLs/etc.,
recursively. New tags can be defined and interpreted in perl.
Extensible: New tags (for use in content items or in the WebMake file
itself) can be added from perl code, providing what amounts to a
dynamically-loaded plugin API.
Inclusion of text: Content can incorporate other content items, simply
by referring to it's name. This is a form of Xanadu-style transclusion.
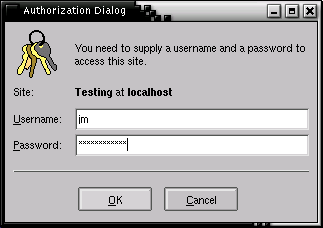
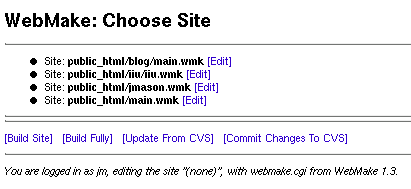
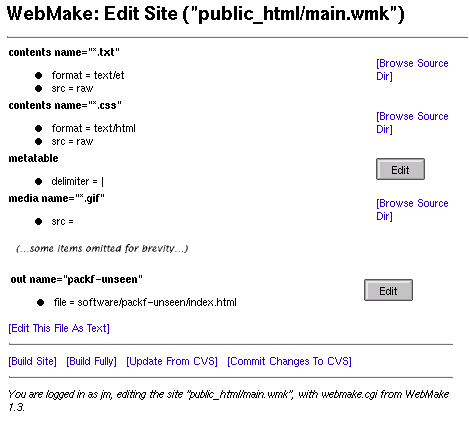
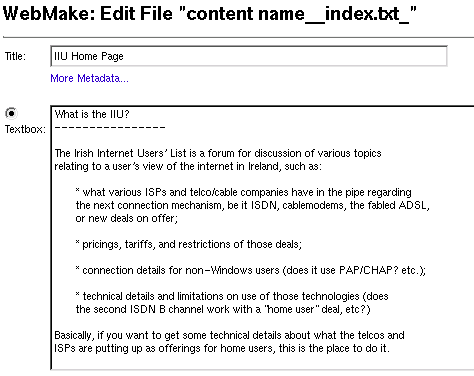
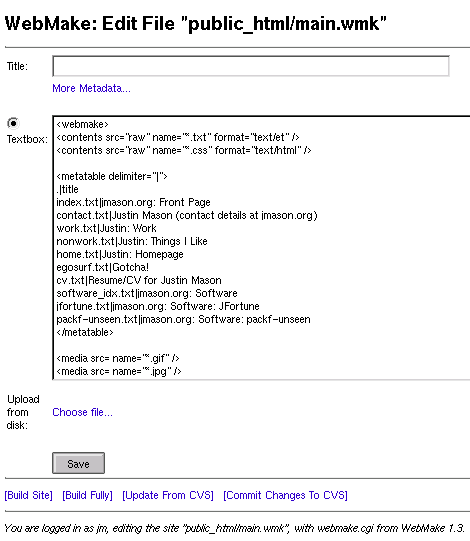
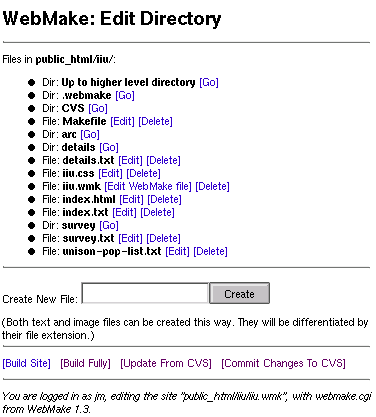
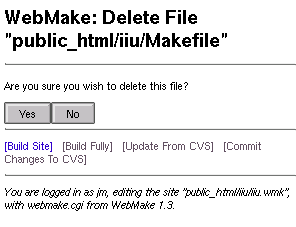
Edit content in your web browser: WebMake now includes webmake.cgi,
which provides a CGI front-end to editing and managing a WebMake site.
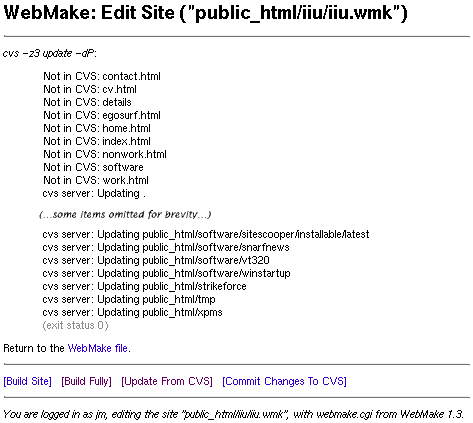
Site replication: with webmake.cgi's CVS integration, multiple copies
of the same site can be replicated, and changes made on any of the sites
will be automatically replicated to all the others.
Version control: changes made to sites using webmake.cgi will be kept
under CVS version control, so older versions of the site can be "rolled
back" if necessary.
But enough of the bulleted lists. Here's where you should start:
First of all, read WebMake Concepts for a quick
intro to the assumptions and concepts that are used in WebMake.
Next, read WebMake Operation for an overview
of how WebMake operates.
Then, read How To Migrate to WebMake for a guide
to bringing an existing, simple web site into WebMake.
After that, you just need to read the rest of the manual, which is mostly
reference text. Good luck!
Concepts
Here's a list of the main concepts behind WebMake's design and implementation.
Before using WebMake, it'll probably help to have a read of this, so you
can understand where the functionality is coming from.
When you start working with the web, it's easy enough to write a few pages and
put them on your site. However, you quickly realise that they all look
different; there's nothing binding them together as one "site".
The next step is to add some common elements to tie the pages together, so you
add some header text or graphics, and maybe a table on one side listing the
other pages in the site, allowing your users to quickly find the other pages.
Maybe you add some information at the bottom of the page, describing who you
are, that kind of thing.
After a while, you'll have quite a few pages, each with a different piece of
main content, but a lot of them sharing some, or all, of the shared
elements -- the templates.
One day, you need to change the templates -- but there's no easy way to do
this, without manually editing each of the files and changing them by hand.
Wouldn't it be easier to just change this once, and be done with it?
That's one of the main features of WebMake: templating. It allows you to
define the templates in one place, then generate pages containing the
content wrapped in those templates.
There's quite a few products that do this; WebMake differs in that it's
very flexible in how you can include your content text in the templates.
Often, other products are limited to just setting a header and a footer to be
added to each page; WebMake takes its cues from traditional UNIX tools by
allowing very deep recursion in its templating, so your templates can include
other templates, etc. etc.
In some situations, you'll want to write HTML; but in others, text is
best, for ease of editing, and reading while you're editing. WebMake
supports Text::EtText and POD formats, converting them to
HTML on-the-fly.
Text::EtText aims to support most of the de-facto conventions we've
been using in mail and in USENET for years, converting them into HTML
in a sensible way.
Another annoyance comes from the default way a web servers serves web pages;
normally, each web page is loaded from a separate file.
This is fine for some sites, but in other circumstances you might want to
produce lots of small pages, or include identical text in several pages; or
you may just prefer editing your entire site in one editor, rather than having
to switch from one window to another.
WebMake allows you to specify several content items inside a single
WebMake .wmk file (the .wmk file uses WebMake's XML-based file format),
and/or load content from a data source, such as a comma-separated values file,
a directory tree, or (possibly in future) an SQL database.
You can then include these content items into the generated web pages,
whichever way you wish, based on the outputs and templates you specify in the
WebMake file.
At some stage, you may feel like rearranging your site, changing
one URL that's always bothered you, so that it becomes more aesthetically
pleasing or descriptive. Or maybe some directive might suddenly appear,
ordering you to do so for policy reasons (ugh). Whatever!
WebMake allows you to track output pages or media, such as images, or
non-WebMake generated pages, using URL references; references to the name
will be converted to the correct URL for that page or image.
The obvious next step is to allow site maps, indexes, and navigational
information to be generated automatically.
WebMake accomplishes this using metadata; in other words, if you tag your
content items with information like its title, its "parent" content item,
and its precedence compared to its neighbours (to specify the order of items),
WebMake can automatically use this information to generate the following maps:
Often, the HTML you'll have to work with may be crufty, with img
tags that have no size information, or other inefficiencies.
WebMake includes a HTML cleaner which will rewrite your HTML until it
sparkles. It can also be turned off for a "HTML verite" effect, if you feel
so inclined. (Alright, it's also a little faster with the cleaner off. Not
much though ;)
You can define your own tags, similar to how JSPs support taglibs; this
provides a way to add scripted components to your pages, without
making things too messy or confusing, or arbitrarily peppering code
into the text.
Or, if you like peppering code into your text, WebMake provides support
for Perl code embedded directly into the text or WebMake file, similar to PHP,
ePerl, HTML::Mason, or ASPs. It also provides an API for that code to
examine or alter WebMake's behaviour.
There's a plugin architecture as well, providing an easy way to load code on
demand from self-contained components.
Several other similar web site management systems revolve around dynamic
code running on the web server, which assembles the pages as they're
requested by the client. In the terminology used by Ian Kallen
when building Salon.Com, they "fry" the pages on-demand.
For most sites, the pages do not change based on which client is accessing
them, or if they do, they don't change entirely; perhaps an extra set of
links becomes available in the page footer allowing a logged-in user to make
modifications using CGI, or PHP or Perl code, but that would be it. The
page just isn't volatile enough to require continual re-generation for each
request.
As a result, all this churning about, generating pages on the fly from its
raw components each time, is wasted; it just eats the server's CPU and
memory for no real gain, and introduces yet another breakage point
(databases, memory usage, the /. effect...) where things can go wrong, just
when you're not looking at it.
WebMake takes the "baking" approach, generating virtually all its output
before the web server gets involved. The web site admin runs the
webmake command, and this generates the pages.
Note that WebMake doesn't preclude dynamic content in the pages, however.
PHP, CGI, ASP or embedded Perl code can be used, and WebMake will not
interfere. In fact, a future version of WebMake will probably provide some
"fried" features of its own...
You can replicate web sites quickly, easily, and securely over the internet.
WebMake does this using CVS and SSH, two standard UNIX utilities that have
been used for years to do exactly the same thing for other types of data;
why not web sites?
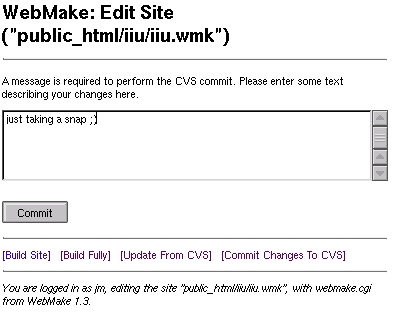
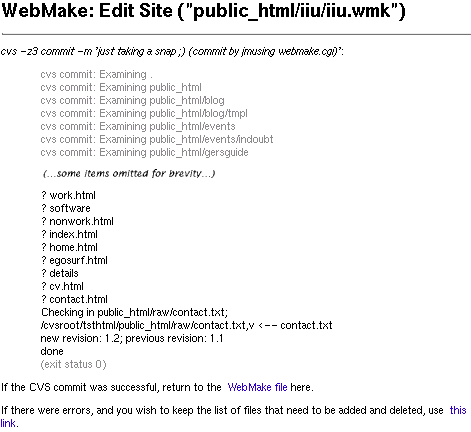
A bonus of using CVS is that you also get seamless version control and
conflict management, so users can edit a WebMake site at any replicated
point, check in the changes, and it won't overwrite everyone else's
modifications.
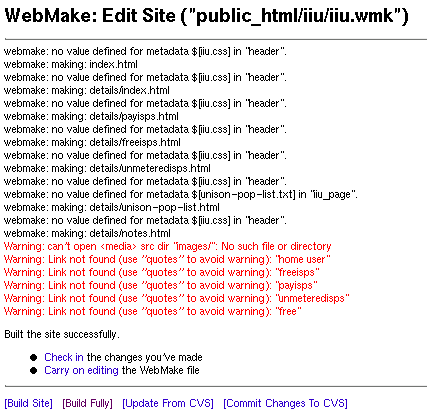
The WebMake distribution includes a CGI script which provides a simple
interface allowing a WebMake site to be edited over the web, and the changes
to be checked in to CVS. At the moment, it's not too user-friendly, so it's
not quite suitable for a newbie to use without some instruction -- but it's
getting there, and it'll improve.
It's certainly handy for an experienced user who wishes to correct a typo or
add a new page to their site, without requiring command-line access to the
server; so if you check out your site in an internet cafe and spot a typo, you
can immediately fix it without downloading an SSH client! ;)
WebMake Operation
First of all, WebMake relies on a WebMake file. This is an XML file, with
a filename ending in .wmk, containing most of the important data on the
structure, inputs and files that make up your site.
If you run WebMake without a -f or -R switch on its command-line,
it'll first search for a file ending with .wmk in the current directory,
then in the parent directory, and so on 'til it hits the root directory.
You can specify exactly which file to build from by using the -f switch.
Alternatively if you use the -R switch, it'll search relative to the
filename specified on the command-line; this is very handy if you're
calling WebMake from a macro in your editor or IDE, as it means you don't even
have to be running the editor in the same working directory as the files
you're working on.
The header: Every WebMake file must start with a <webmake> tag.
Options and libraries: Quite often, you may want to use some of the optional plug-ins provided with WebMake, or occasionally, you
might need to set options to control WebMake's
behaviour. The top of the WebMake file is a good place to do this.
Inputs: searching directories and data sources: The important bit!
WebMake allows you to load content text, HTML templates, or URLs of media
files (such as images), from directories in the filesystem.
Inputs embedded in the WebMake file: Another key area. Content text, HTML templates and
tables of small items of content or metadata can be embedded directly into the WebMake file,
for ease of editing.
Metadata: If you want your site to contain pages which list details about,
or links to, other pages, generated on-the-fly, metadata is
the way to do it. WebMake supports several ways of tagging your content with
metadata to provide this. Metadata can be embedded into the
content text, or tagged onto the content after
its already been declared.
Outputs: Finally, all that data needs to be written somewhere. The out tag takes care of this. Each out block
is roughly equivalent to a target in traditional UNIX make(1)
terminology; the text inside the tag is expanded (by expanding ${content references}) and written to the
named file. Since quite a lot of output is typically almost identical in
terms of the templates it uses and they way it converts the output filename to
the name of the content text to insert, the for tag is
useful here to automate the process.
The footer: Finally, the WebMake file ends with a
</webmake> tag.
Normally, all outputs named in the WebMake file are scanned, and possibly
re-generated. However, if a target has been specified on the command line,
only that file will be "made".
"Making" the target is not the end of it -- strictly speaking, the target
may or may not be updated. WebMake tracks the dependencies of each file, and
if these have not changed, the file will not be rebuilt.
That's the first optimisation. However it doesn't always work; if some of the
file's text is generated by, or depends on text that contains dynamic Perl
code, WebMake will always have to rebuild the file, as it cannot determine
exactly what the Perl code is going to do!
To avoid continually "churning" the file, regenerating it every time WebMake
is run, a comparison step takes place. Before the file is written to disk,
WebMake compares the file in memory with the file on disk; if there are no
changes, the on-disk file will not be modified in any way. This means tools
like rsync(1), rdist(1) or even make(1) itself will work fine with
a WebMake site.
All of these optimisations can be overridden by using the -F (freshen)
command-line switch; this will force output whether or not the files have
changed.
A very large (or very complicated) WebMake site can take a while to update.
To avoid broken links while updating the site, WebMake generates all output
into temporary files called filename.new; once all the output
has been generated, these are renamed into place. This minimises the
time during which there may be inconsistencies in the site.
Since WebMake uses dependencies to avoid rebuilding the entire site
every time, it needs to cache metadata and dependency information
somewhere.
Currently this data is stored in a file called filename/cache.db,
where filename is a sanitised version of the WebMake file's name, in the
.webmake subdirectory of your home directory.
How to Migrate to WebMake
Chances are, you already have a HTML site you wish to migrate to WebMake.
This document introduces WebMake's way of doing things, and how to go
about a typical migration.
First, pick a top-level directory for the site; that's where you'll place your
.wmk file. All the generated files should be beneath this directory. In
this example I'll call it index.wmk.
Next, identify the page templates used in the site. To keep it simple, let's
imagine you have only one look and feel on the pages, with the usual stuff in
it; high-level HTML document tags, such as <html>, <head>,
<title>, <body>, that kind of stuff. There may also be some
formatting, such as a <table> with a side column containing links, etc.,
or a top-of-page title. All of these are good candidates for moving into a
template. I typically call these templates something obvious like
page_template or sitename_template, where sitename is the name of
the site.
For this example, let's imagine you have the HTML high-level tags and a page
title as your typical template items.
So edit the index.wmk file, and add a template content item, by cutting
and pasting it from one of your pages. Instead of cutting and pasting the
real title, use a metadata reference:
$[this.title]. Also, replace the text of the page
with ${page_text}; the plan is that, before this content item
will be referenced, this content item will have been set to the text you wish
to use.
Next, run through the pages you wish to WebMake-ify, and either:
move them into a "raw" subdirectory, from where WebMake can read them
with a <contents> tag, or;
include them into the index.wmk file directly.
It's a matter of taste; I initially preferred to do 1, but nowadays 2 seems
more convenient for editing, as it provides a very easy way to break up long
pages, and it makes search-and-replace easy. Anyway, it's up to you. I'll
illustrate using 2 in this example.
Give each content item a name. I generally use the name of the HTML file, but
with a .txt extension instead of .html. This lets me mentally
differentiate the input from the output, but still lets me quickly see the
relationship between input file and output file.
Strip the template elements (head tag, surrounding eye-candy tables, etc.)
from each page, leaving just the main text body behind. Keep the titles
around for later, though.
     <content name="document1.txt">
       ....your html here...
     </content>
     <content name="document2.txt">
       ....your html here...
     </content>
     <content name="document3.txt">
       ....your html here...
     </content>
Now, one of the best bits of WebMake (in my opinion) is EtText,
the built-in simple text markup language; to use this, run the command-line
tool ethtml2text on each of your HTML files to convert them
to EtText, then include that text, instead of the HTML, as the content items.
Don't forget to add format="text/et" to the content tag's attributes,
though:
Next, you need to set the titles in the content items, so that they can be
used in higher-level templates, such as the page_template content item we
defined earlier.
To really get some power from WebMake, use metadata to do this.
What is Metadata?
A metadatum is like a normal content item, except it is exposed to other
pages in the index.wmk file. Normally, you cannot reliably read a dynamic
content item that was set from another page; if one content item sets a
variable like this:
<{set foo="Value!"}>
Any content items evaluated after that variable is set can access
${foo}, as long as they occur on the same output page.
However if they occur on another output page, they may not be able to access
${foo}.
To get around this, WebMake includes the <wmmeta> tag,
which allows you to attach data to a content item. This data will then be
accessible, both to other pages in the site (as
$[contentname.metaname], and to other content
items within the same page (as $[this.metaname]).
Think of them as like size, modification time, owner etc. on files. A good
concept is that it's data used to generate catalogs or lists.
Anyway, titles of pages are a perfect fit for metadata. So convert your
page titles into <wmmeta> tags like so:
(BTW it's not required that metadata be stored in the content text; it can
also be loaded en masse from another location, such as the WebMake file, or
another file altogether, using the <metatable>
directive. Again, it's a matter of taste.)
Sometimes, for example if you plan to generate index pages or a sitemap, you
may wish to add a one-line summary of the content item as a metadatum called
abstract. I'll leave it out of the examples, just to keep them simple.
Metadata may seem like a lot of bother, but it's a perfect fit when you need to
generate pages that list links to, or details about, the pages in your site.
It should always be referred to in $[square
brackets]. I'll explain why later on.
Finally, you've assembled all the content items; now to tell WebMake
where they should go. This is accomplished using the <out> tag.
Each output URL, in this example, requires the following content items:
${page_template}, which refers to:
$[this.title]
${page_text}
As you can see, both this.title and page_text rely on which output URL
is being written, otherwise you'll wind up with lots of finished pages
containing the same text. ;)
There are several ways to deal with this.
Set a variable in the <out> text, using <{set}>, to the name
of the content item that should be used for the page_text.
Derive the correct value for page_text using the name of the
<out> section itself.
The simplest way is the latter. WebMake defines a built-in "magic"
variable, ${WebMake.OutName}, which contains the
name of the output URL. (Note that output URLs have both a name and a
filename; you'll see why in the next section.)
Line 2, in the example above, needs an explanation.
This takes the name of the output URL (as discussed above), using a content
reference: ${WebMake.OutName}. For example, let's say the
page was named pageurl.
Finally, it stores that in a content item called page_text.
This looks pretty complicated -- and it is. But the important thing is that,
as in traditional UNIX style, it's also a very powerful way to do templating
and variable interpolation; once you get the hang of it, there's plenty more
stuff it can do.
BTW: you could simply skip defining this "helper" content item altogether,
and just go to the top of the file and change the template to refer directly
to ${${WebMake.OutName}.txt} instead of
${page_text} . That's what I usually do.
But what about the title? Handily, since we defined the titles as metadata,
and referred to them as $[this.title] in page_template,
this is taken care of; once the ${page_text} reference is
expanded, $[this.title] will be set.
The example page contains the following content references:
${page_template}, which refers to:
$[this.title]
${page_text}
Since ${page_text} is a normal content reference, it will be
expanded first; and when it's expanded, the <wmmeta> tag setting
title will be encountered. This will cause this.title to be set.
Once all the normal content references are expanded, WebMake runs through
the deferred references, causing $[this.title] to
be expanded.
If page_template had used a normal content reference to refer to
${this.title}, WebMake would have tried to expand it before
${page_text}, since it appeared in the file earlier.
Each output URL needs an <out> tag, with a name and a file. The
name provides a symbolic name which one can use to refer to the URL; the
file names the file that the output should be written to.
Typically the name should be similar to the page's main content item's name,
to keep things simple and allow the shortcut detailed in the previous section
to work.
Also, sites typically use a pretty similar filename to the name, for obvious
reasons. At least, they do, to start with; further down the line, you may
need to move one (or more) pages around in the URL or directory hierarchy;
since you've been referring to them by name, instead of by URL or by filename,
this means changing only one attribute in the <out> tag, instead of
trying to do a global search and replace throughout hundreds of HTML files.
The important thing here, is that any references to ${page} inside
the <for> block, will be replaced with the name of the current item
in the values list.
WebMake is, arguably, a Content Management System, or CMS.
To be more specific, it's oriented entirely towards generating a relatively
static site, such as a weblog, a news site (without comments or
personalisation) or a typical informational site.
It does not have any dynamic, database-driven, features suitable for "live"
sites that update frequently with dynamic data; nor does it have support for
"personalisation" features, where the site displays different data based on
what the user presents in their HTTP request. (Of course, using WebMake does
not preclude using PHP, mod_perl, Mason etc. to provide these, however.)
Since, logically, content and layout are entirely separate tasks, they
should be easy to keep separate in the CMS.
WebMake uses content references to include content into pages, and
implement templating. This allows you to separate the content text from
the template layout HTML; the template designers just need to include
a content reference, such as ${body}, instead of the
text.
No requirement for text editors to know HTML
Only the layout staff should really need to know HTML, so the staff who
provide text content can do this without HTML knowledge.
WebMake provides Text::EtText, which provides an
easy-to-edit, easy-to-read and intuitive way to write HTML, based on the
plain-text markup conventions we've been using for years.
Generation of pages automatically, using metadata from content items
It should be possible to generate index pages, sitemaps, navigation links,
and other text automatically, based on properties and metadata of the
pieces of content loaded.
WebMake supports this by allowing any content item to carry arbitrary
textual metadata. Perl code can then be used to dynamically
request a list of content items that have a particular set of metadata,
and any page can refer to another content item's title, description,
abstract etc. without itself needing to parse the content text.
Flexible URL support
It should be trivial to rearrange a site, if required, totally changing
the URLs used in the site's pages.
WebMake supports this by using symbolic URL references,
which can be modified by changing one line, causing references to that
URL throughout the site to change.
Edit-In-Page Functionality
Most CMSes boast a nice, browser-based user interface to creating, naming,
uploading and filling out content items and media.
WebMake now provides a CGI script, which allows a certain
degree of web-based maintainance and content editing. It's not quite as
foolproof as some of the bigger CMS systems, but it's a start!
It would be nice if WebMake could load content from a database. It
currently cannot, although there's nothing in the architecture that would
preclude this; there just has not been a need, just yet.
Unfortunately, this may not be possible -- this IBM software patent details a mechanism whereby a server can dynamically rebuild its
pages, based on changes to objects in a database. WebMake could run
afoul of this if database support is added (although there are a few
points where this could be avoided).
XSLT Support
This will definitely arrive -- as soon as a good XSLT engine becomes part
of Perl, or at least becomes easy to install from CPAN. It's on my list ;)
Workflow
There's currently no logic to support workflow. This would not
be difficult to add, though.
The root directory of the WebMake distribution includes a Vim rc file
to support syntax-highlighting for WebMake. To use it, make a directory
called .vim in your home directory, copy it there, and add the following
lines to your .vimrc:
au BufNewFile,BufReadPost *.wmk so $HOME/.vim/webmake.vim
map ,wm :w!<CR>:! /usr/local/bin/webmake -R %<CR>
Change /usr/local/bin/webmake to whatever the real path to the webmake
command is.
Once you do this, the macro sequence ,wm will cause a rebuild of the site
which contains the file you're currently editing. In addition, opening a
file called something.wmk will automatically use WebMake syntax
highlighting (if you have syntax highlighting enabled in VIM).
Feel free to include it on your pages; but please, if possible, add it with a
href to http://webmake.taint.org/, so people who are curious can find out more
about WebMake.
It's 88 pixels wide and 31 high, by the way. If you look in the "images"
directory of the distribution, there's also an 130x45 one and a 173x60 one.
To make things really easy, here's some cut-and-paste HTML
for the image:
Here's a list of people who've contributed to WebMake:
Justin Mason <jm /at/ jmason.org>: original author and maintainer
Mark McLoughlin <mark /at/ skynet.ie>: added perlout directive,
fixes to HTML cleaner
Caolan McNamara <caolan /at/ csn.ul.ie>: EtText contributions;
lists, pre-formatted text, lots of suggestions; he's written a nice
testimonial here.
Jan Hudec <bulb /at/ ucw.cz>: navtree plugin, patches to remove
metadata from site mapping and control mapping of media items
Matthew Clarke <clamat /at/ van.maves.ca>: doco fix for datasource
documentation
rudif /at/ bluemail.ch: lots of help with supporting Windows
Thanks all! Patches and suggestions are welcomed -- send them in!
(By the way, patch contributors get listed at the top, 'cos patches save
me writing the code ;)
Contents for the 'Tags and Their Attributes' section
Arbitrary files can be included into the current WebMake file
using this tag. It has one attribute, file, which
names the file to include.
A set of libraries are available to include, distributed with
WebMake. See the Included Library Code section of the index
page for their documentation. However, these
should be loaded using the <use> tag instead of this
one.
WebMake supports "plugin" libraries, which are generally other .wmk files or
Perl modules which can be loaded to extend WebMake's functionality.
For example, there are standard plugins to provide support for "download"
links, which allows links to files including their size, ownership
information, etc.; there's also a plugin which allows HTML tables to be
defined using a comma-separated value list.
It has one attribute, plugin, which names the plugin to load.
Plugins can be loaded from the WebMake perl library directory, or from the
user's home directory. The search path for a plugin is as follows:
~/.webmake/plugins/plugin.wmk
${WebMake.PerlLib}/plugin.wmk
The set of standard plugins are listed in the Included Library Code
section of the index page.
The <content> tag, along with the other similar content-defining tags
like <contents>, <template> etc., is used as one of the basic
building blocks of a WebMake file.
Essentially, you use it to wrap input, and give them a name, so that you can
refer to them later in <out> blocks or other content items.
This tag has one required attribute: its name, which is used to substitute in
that section's text, by inserting it in other sections or out tags in a
curly-bracket reference, like so:
${foo}
If you wish to define a number of content sections at once, they can be
searched for and loaded en masse using the <contents> tag.
The following attributes are supported. These can also be set using the
<attrdefault> tag.
format
This allows the user to define what format the content
is in. This allows markup languages other than HTML to be used;
webmake will convert to HTML format, or other output formats, as
required using the HTML::WebMake::FormatConvert module. The default
value is "text/html".
asis
This will block any interpretation of content or URL
references in the content item, until after it has been converted into
HTML format. This is useful for POD documentation, which may be
embedded inside a file containing other text; without "asis", the
text would be scanned for content references before the POD converter
stripped out the extraneous bits. The default value is "false".
map
Whether the content item should be mapped in a site
map, or not. The default value is "true".
up
The name of the content item which is this content item's
parent, in the site map.
preproc
Pre-process content items using a Perl function.
isroot
Whether or not this content item is the root of the
site map. The default value is "false". (This
cannot be used as a parameter to a tag that loads multiple content
items, like the <contents> tag.)
src
Allows the text of the content item to be loaded from
a given URL (remote content) or file in the filesystem. (Again,
this is not usable from a tag that loads multiple items.)
updatefreq
How long a remote content item should be cached.
(Again, this is not usable from a tag that loads multiple items.)
Content items can be loaded remotely, ie. via HTTP or FTP, by using a URL in
the src attribute. These will be cached for as long as the update
frequency updatefreq dictates, by default 1 hour. The update frequency is
a string in this format:
[n days] [n hours] [n mins] [n secs]
So, for, example, 1 hour 20 seconds converts to 3620 seconds.
Using the preproc attribute, you can specify a block of perl code
to execute over each content item's text. The content item's text is
provided in the $_ variable. (Since the XML attribute
format doesn't provide much room for perl code, your best bet is to
call a function to do the work.)
This can be very handy. Here's some suggested uses:
multiple templates can be loaded from one HTML file; for example, if
your designer has created a template for a "list page", with HTML for
the page layout, a table, odd list lines, and even list lines, you can
use just one template file as a src, and define multiple content
items from it using different preproc functions and the
scrape_xml() Perl code library function. The Scraped Templates page goes into more detail
on how to use this.
If you combine this with an agreed format for "filler" text or
variable references, then you can replace filler with valid content
references on-the-fly, and avoid having to persuade the designer to
understand how content refs work. For example, your designer
could use the lorem ipsum text to indicate "main body text";
using a sub like this
s/lorem\s+ipsum[^<]+/\${main_body}/gs;
you can convert that text into a reference to a content item
called main_body.
you can convert raw formats to more friendly-looking presentation on the
fly; for example, my blog at taint.org
(view source) is updated through
email, and those mails are stored as raw mails to the filesystem.
WebMake converts them to HTML using EtText and a short preproc
function which strips out email addresses for spam protection. (See
example below)
sections of text can be loaded from third-party websites or files,
regardless of the markup surrounding it. By using a perl sub like
		s/^.*?<!-- start of text table -->//gs;
		s/<!-- end of text table -->.*?$//gs;
you can strip off the unwanted parts of the file; in other words,
HTML screen scraping. Again, the scrape_xml()
Perl code library function is handy here.
Perl code can obtain the text of content items using the get_content()
function, and can treat content items as whitespace-separated lists using
get_list().
In addition, each content item has a range of properties and associated
metadata; the get_content_object() method allows Perl code to retrieve
an object of type HTML::WebMake::Content representing the content
item.
  <content name="foo" format="text/html">
  <em>This is a test.</em>
  </content>

  <content name="bar" format="text/et">
  Still Testing
  -------------

  So is this!
  </content>

  <content name="remote" format="image/png"
	  src="http://webmake.taint.org/BuiltWithWebMakeBigger.png">
  </content>

  <{perl sub mail_fmt {
      local ($_) = shift;
      s/\S+\@\S+/\(spam-protected\)/gs;		# remove email addrs
      $_;
    }
  ''; }>
  <contents src="raw" format="text/et"
	   name=".../*.mail" preproc="mail_fmt($_)" />
The <template> Tag
The <template> tag is identical in most respects to the
<content> tag.
Typically, one will want to differentiate textual content, such as news
articles, from template content, such as page templates. This tag allows
those semantic differences to be expressed at a high level; use
<content> blocks for textual content, and
<template> blocks for template content.
Note that <template> blocks are never mapped in site maps, and
cannot hold metadata.
It is implemented as a content item with the map attribute set to
false.
Quite often, it's handy to define small (one-line) content items quickly, in
bulk, directly inside the WMK file itself. The <contenttable> tag
provides a good way to do this.
Firstly, pick a delimiter character, such as |. Set the delimiter
attribute to this character.
Next, list a table of content names and their values, separated by a delimiter
character, one name-value-pair per line.
Note: if you would prefer to load the content items from a separate
file, the <contents> tag is better suited.
Another note: this is not the way to define data about other content
items (in other words, metadata), such as titles, authorship, or brief
descriptions, as WebMake's built-in metadata support will not be available
in that case. Embedding the metadata into the content item using
<wmmeta> tags, or loading them in bulk using <metatable> tags,
should be used instead.
Content can be searched for using the <contents> tag, which allows you
to search a data source (directory, delimiter-separated-values file,
database etc.) for a pattern.
Apart from the fact that it loads many contents instead of one, it's otherwise
identical to the content tag; see that tag's documentation
for details on what attributes are supported.
All datasources require this attribute, which
specifies a protocol and path, in a URL-style syntax:
protocol:path . file: is the default protocol, if none is
specified.
name
This attribute is used to specify the pattern of data,
under this path, which will be converted into content or media items.
The part of the data's location which matches this name pattern will
become the name of the item. Typically, WebMake glob patterns, such as "*.txt" or ".../*.html" are used.
skip
A pattern which should match filenames that should be
skipped. Files that match this pattern will not be included as content
or media items, or as metatables. Glob patterns, again, are
used here.
prefix
The items' names can be further modified by specifying
a prefix and/or suffix; these strings are prepended or
appended to the raw name to make the name the content is given.
suffix
See above.
namesubst
a Perl-formatted s// substitution, which is used to
convert source filenames to content names. See the example under
The File: Protocol, below.
nametr
a Perl tr// translation, which is used to convert
source filenames to content names.
listname
a name of a content item. This content item will be
created, and will contain the names of all content items picked up by
the <contents> or <media> search.
In addition, the attributes supported by the content tag can
be specified as attributes to <contents>, including
format, up, map, etc.
Also, the attributes supported by the <metatable> tag
can be used if you've specified a metatable attribute. Note that
metatableformat should be used instead of format, as format
is already used for the content items.
The content blocks picked up from a <contents> search can
also contain meta-data, such as headlines, visibilty dates, workflow approval
statuses, etc. by including metadata.
The file: protocol loads content from a directory; each file is made into one
content chunk. The src attribute indicates the source directory, the
name attribute indicates the glob pattern that will pick up the
content items in question.
<contents src="stories" name="*.txt" />
The filename of the file will be used as the content chunk's name -- unless
you use the namesubst command; see below for details on this.
Note that, for efficiency, the files in question are not actually opened until
their content chunks are referenced using ${name} or
get_content("name").
Normally only the top level of files inside the src directory are added to
the content set. However, if the name pattern starts with .../, the
directory will be searched recursively:
<contents src="stories" name=".../*.txt" />
The resulting content items will contain the full path from that directory
down, i.e. the file stories/dir1/foo/bar.txt exists, the example above
would define a content item called ${dir1/foo/bar.txt}.
If you use the namesubst command, the filename will be modified using that
substitution, to give the content item's name. So, for example, this contents
tag:
You can now load metadata from external files while searching a directory tree
for content items or media files. This allows you to load image titles, etc.
from files which match the filename pattern you specify in the metatable
attribute.
The attributes supported by the <metatable> tag can be
used in the datasource tag's attribute set, if you've specified a
metatable attribute, allowing you to define the format of the
metatable files you expect to find.
There's one major difference between normal metatables and metatables
found via a data source; the names in this kind of metatable refer to
the content or media object's filename, not its content name.
In other words, the names of any content items referred to in the metatable
files will be modified, as follows:
if the name attribute contains .../, then the content items
could be deep in a subdirectory. The metatable file does not have
to contain the full path to the content item's name; it can just
contain the item's filename relative to the metatable itself.
if a namesubst or nametr function is specified, the content
names in the metatable will be processed with this. Again, this
means that the metatable data just has to provide the filename,
not whatever the resulting content item will be called.
These features will hopefully make the operation a little more intuitive, as
users who add files to a media or contents directory will not have to figure
out what the resulting content item will be called; they can just refer to
them by their filename, when tagging them with metadata.
The svfile: protocol loads content from a delimiter-separated-file; the
src attribute is the name of the file, the name is the glob
pattern used to catch the relevant content items. The namefield
attribute specifies the field number (counting from 1) which the name
pattern is matched against, and the valuefield specifies the number of
the field from which the content chunk is read. The delimiter
attribute specifies the delimiter used to separate values in the file.
If you create a file called NEW_FILE_TEMPLATE in a contents directory,
that will be used as a template for WebMakeCGI users editing new files under
that directory. Files with this name will be automatically skipped by
WebMake.
The <templates> tag is identical in most respects to the
<contents> tag.
Typically, one will want to differentiate textual content, such as news
articles, from template content, such as page templates. This tag allows
those semantic differences to be expressed at a high level; use
<contents> directives for textual content, and
<templates> directives for template content.
It is implemented as a contents directive with the map attribute set to
false.
All datasources require this attribute, which
specifies a protocol and path, in a URL-style syntax:
protocol:path . file: is the default protocol, if none is
specified.
name
This attribute is used to specify the pattern of data,
under this path, which will be converted into content or media items.
The part of the data's location which matches this name pattern will
become the name of the item. Typically, WebMake glob patterns, such as "*.txt" or ".../*.html" are used.
skip
A pattern which should match filenames that should be
skipped. Files that match this pattern will not be included as content
or media items, or as metatables. Glob patterns, again, are
used here.
prefix
The items' names can be further modified by specifying
a prefix and/or suffix; these strings are prepended or
appended to the raw name to make the name the content is given.
suffix
See above.
namesubst
a Perl-formatted s// substitution, which is used to
convert source filenames to content names. See the example under
The File: Protocol, below.
nametr
a Perl tr// translation, which is used to convert
source filenames to content names.
listname
a name of a content item. This content item will be
created, and will contain the names of all content items picked up by
the <contents> or <media> search.
In addition, the attributes supported by the content tag can
be specified as attributes to <contents>, including
format, up, map, etc.
Also, the attributes supported by the <metatable> tag
can be used if you've specified a metatable attribute. Note that
metatableformat should be used instead of format, as format
is already used for the content items.
The content blocks picked up from a <contents> search can
also contain meta-data, such as headlines, visibilty dates, workflow approval
statuses, etc. by including metadata.
The file: protocol loads content from a directory; each file is made into one
content chunk. The src attribute indicates the source directory, the
name attribute indicates the glob pattern that will pick up the
content items in question.
<contents src="stories" name="*.txt" />
The filename of the file will be used as the content chunk's name -- unless
you use the namesubst command; see below for details on this.
Note that, for efficiency, the files in question are not actually opened until
their content chunks are referenced using ${name} or
get_content("name").
Normally only the top level of files inside the src directory are added to
the content set. However, if the name pattern starts with .../, the
directory will be searched recursively:
<contents src="stories" name=".../*.txt" />
The resulting content items will contain the full path from that directory
down, i.e. the file stories/dir1/foo/bar.txt exists, the example above
would define a content item called ${dir1/foo/bar.txt}.
If you use the namesubst command, the filename will be modified using that
substitution, to give the content item's name. So, for example, this contents
tag:
You can now load metadata from external files while searching a directory tree
for content items or media files. This allows you to load image titles, etc.
from files which match the filename pattern you specify in the metatable
attribute.
The attributes supported by the <metatable> tag can be
used in the datasource tag's attribute set, if you've specified a
metatable attribute, allowing you to define the format of the
metatable files you expect to find.
There's one major difference between normal metatables and metatables
found via a data source; the names in this kind of metatable refer to
the content or media object's filename, not its content name.
In other words, the names of any content items referred to in the metatable
files will be modified, as follows:
if the name attribute contains .../, then the content items
could be deep in a subdirectory. The metatable file does not have
to contain the full path to the content item's name; it can just
contain the item's filename relative to the metatable itself.
if a namesubst or nametr function is specified, the content
names in the metatable will be processed with this. Again, this
means that the metatable data just has to provide the filename,
not whatever the resulting content item will be called.
These features will hopefully make the operation a little more intuitive, as
users who add files to a media or contents directory will not have to figure
out what the resulting content item will be called; they can just refer to
them by their filename, when tagging them with metadata.
The svfile: protocol loads content from a delimiter-separated-file; the
src attribute is the name of the file, the name is the glob
pattern used to catch the relevant content items. The namefield
attribute specifies the field number (counting from 1) which the name
pattern is matched against, and the valuefield specifies the number of
the field from which the content chunk is read. The delimiter
attribute specifies the delimiter used to separate values in the file.
WebMake allows you to refer to files and web pages symbolically, separating
the site layout from the URL structure, and avoiding later problems with
dangling links when a page's URL is changed. This is done using $(url_refs).
This works well for content items defined in WebMake, such as output files
defined using the <out> tag. However it is not handy
when dealing with a images or other files that are not
generated using WebMake.
Therefore media files, such as images, and external, non-WebMake-controlled
files, can be searched for using the <media> tag. This tag allows you to
search a data source (directory, etc.) for a pattern.
Note that data sources which do not map to files in a filesystem, or other
methods accessible to a web browser browsing your site, do not make sense
for the <media> tag; so, for example, the svfile: protocol is
not supported, as a web browser cannot load an image from a CSV file.
As a result, currently only one data source protocol can be used with
the <media> tag, namely file:.
All datasources require this attribute, which
specifies a protocol and path, in a URL-style syntax:
protocol:path . file: is the default protocol, if none is
specified.
name
This attribute is used to specify the pattern of data,
under this path, which will be converted into content or media items.
The part of the data's location which matches this name pattern will
become the name of the item. Typically, WebMake glob patterns, such as "*.txt" or ".../*.html" are used.
skip
A pattern which should match filenames that should be
skipped. Files that match this pattern will not be included as content
or media items, or as metatables. Glob patterns, again, are
used here.
prefix
The items' names can be further modified by specifying
a prefix and/or suffix; these strings are prepended or
appended to the raw name to make the name the content is given.
suffix
See above.
namesubst
a Perl-formatted s// substitution, which is used to
convert source filenames to content names. See the example under
The File: Protocol, below.
nametr
a Perl tr// translation, which is used to convert
source filenames to content names.
listname
a name of a content item. This content item will be
created, and will contain the names of all content items picked up by
the <contents> or <media> search.
In addition, the attributes supported by the content tag can
be specified as attributes to <contents>, including
format, up, map, etc.
Also, the attributes supported by the <metatable> tag
can be used if you've specified a metatable attribute. Note that
metatableformat should be used instead of format, as format
is already used for the content items.
The content blocks picked up from a <contents> search can
also contain meta-data, such as headlines, visibilty dates, workflow approval
statuses, etc. by including metadata.
The file: protocol loads content from a directory; each file is made into one
content chunk. The src attribute indicates the source directory, the
name attribute indicates the glob pattern that will pick up the
content items in question.
<contents src="stories" name="*.txt" />
The filename of the file will be used as the content chunk's name -- unless
you use the namesubst command; see below for details on this.
Note that, for efficiency, the files in question are not actually opened until
their content chunks are referenced using ${name} or
get_content("name").
Normally only the top level of files inside the src directory are added to
the content set. However, if the name pattern starts with .../, the
directory will be searched recursively:
<contents src="stories" name=".../*.txt" />
The resulting content items will contain the full path from that directory
down, i.e. the file stories/dir1/foo/bar.txt exists, the example above
would define a content item called ${dir1/foo/bar.txt}.
If you use the namesubst command, the filename will be modified using that
substitution, to give the content item's name. So, for example, this contents
tag:
You can now load metadata from external files while searching a directory tree
for content items or media files. This allows you to load image titles, etc.
from files which match the filename pattern you specify in the metatable
attribute.
The attributes supported by the <metatable> tag can be
used in the datasource tag's attribute set, if you've specified a
metatable attribute, allowing you to define the format of the
metatable files you expect to find.
There's one major difference between normal metatables and metatables
found via a data source; the names in this kind of metatable refer to
the content or media object's filename, not its content name.
In other words, the names of any content items referred to in the metatable
files will be modified, as follows:
if the name attribute contains .../, then the content items
could be deep in a subdirectory. The metatable file does not have
to contain the full path to the content item's name; it can just
contain the item's filename relative to the metatable itself.
if a namesubst or nametr function is specified, the content
names in the metatable will be processed with this. Again, this
means that the metatable data just has to provide the filename,
not whatever the resulting content item will be called.
These features will hopefully make the operation a little more intuitive, as
users who add files to a media or contents directory will not have to figure
out what the resulting content item will be called; they can just refer to
them by their filename, when tagging them with metadata.
Contents or URLs can be searched for using the <contents>,
<templates> or <media> tags, which allow
you to search a data source (directory, delimiter-separated-values file,
database etc.) for a pattern.
<contents> and <media> tags can also pick
up metadata from metatable files while searching for content or media items,
using the metatable attribute.
Currently two data source protocols are defined, file: and svfile: .
All datasources require this attribute, which
specifies a protocol and path, in a URL-style syntax:
protocol:path . file: is the default protocol, if none is
specified.
name
This attribute is used to specify the pattern of data,
under this path, which will be converted into content or media items.
The part of the data's location which matches this name pattern will
become the name of the item. Typically, WebMake glob patterns, such as "*.txt" or ".../*.html" are used.
skip
A pattern which should match filenames that should be
skipped. Files that match this pattern will not be included as content
or media items, or as metatables. Glob patterns, again, are
used here.
prefix
The items' names can be further modified by specifying
a prefix and/or suffix; these strings are prepended or
appended to the raw name to make the name the content is given.
suffix
See above.
namesubst
a Perl-formatted s// substitution, which is used to
convert source filenames to content names. See the example under
The File: Protocol, below.
nametr
a Perl tr// translation, which is used to convert
source filenames to content names.
listname
a name of a content item. This content item will be
created, and will contain the names of all content items picked up by
the <contents> or <media> search.
In addition, the attributes supported by the content tag can
be specified as attributes to <contents>, including
format, up, map, etc.
Also, the attributes supported by the <metatable> tag
can be used if you've specified a metatable attribute. Note that
metatableformat should be used instead of format, as format
is already used for the content items.
The content blocks picked up from a <contents> search can
also contain meta-data, such as headlines, visibilty dates, workflow approval
statuses, etc. by including metadata.
The file: protocol loads content from a directory; each file is made into one
content chunk. The src attribute indicates the source directory, the
name attribute indicates the glob pattern that will pick up the
content items in question.
<contents src="stories" name="*.txt" />
The filename of the file will be used as the content chunk's name -- unless
you use the namesubst command; see below for details on this.
Note that, for efficiency, the files in question are not actually opened until
their content chunks are referenced using ${name} or
get_content("name").
Normally only the top level of files inside the src directory are added to
the content set. However, if the name pattern starts with .../, the
directory will be searched recursively:
<contents src="stories" name=".../*.txt" />
The resulting content items will contain the full path from that directory
down, i.e. the file stories/dir1/foo/bar.txt exists, the example above
would define a content item called ${dir1/foo/bar.txt}.
If you use the namesubst command, the filename will be modified using that
substitution, to give the content item's name. So, for example, this contents
tag:
You can now load metadata from external files while searching a directory tree
for content items or media files. This allows you to load image titles, etc.
from files which match the filename pattern you specify in the metatable
attribute.
The attributes supported by the <metatable> tag can be
used in the datasource tag's attribute set, if you've specified a
metatable attribute, allowing you to define the format of the
metatable files you expect to find.
There's one major difference between normal metatables and metatables
found via a data source; the names in this kind of metatable refer to
the content or media object's filename, not its content name.
In other words, the names of any content items referred to in the metatable
files will be modified, as follows:
if the name attribute contains .../, then the content items
could be deep in a subdirectory. The metatable file does not have
to contain the full path to the content item's name; it can just
contain the item's filename relative to the metatable itself.
if a namesubst or nametr function is specified, the content
names in the metatable will be processed with this. Again, this
means that the metatable data just has to provide the filename,
not whatever the resulting content item will be called.
These features will hopefully make the operation a little more intuitive, as
users who add files to a media or contents directory will not have to figure
out what the resulting content item will be called; they can just refer to
them by their filename, when tagging them with metadata.
The svfile: protocol loads content from a delimiter-separated-file; the
src attribute is the name of the file, the name is the glob
pattern used to catch the relevant content items. The namefield
attribute specifies the field number (counting from 1) which the name
pattern is matched against, and the valuefield specifies the number of
the field from which the content chunk is read. The delimiter
attribute specifies the delimiter used to separate values in the file.
New data sources for <contents> and <media> tags are added by
writing an implementation of the DataSourceBase.pm module, in the
HTML::WebMake::DataSources package space (the
lib/HTML/WebMake/DataSources directory of the distribution).
Every data source needs a protocol, an alphanumeric lowercase identifier
to use at the start of the src attribute to indicate that a data source is
of that type.
Each implementation of this module should implement these methods:
new ($parent)
instantiate the object, as usual.
add ()
add all the items in that data source as content
chunks. (See below!)
get_location_url ($location)
get the location (in URL
format) of a content chunk loaded by add().
get_location_contents ($location)
get the contents of the
location. The location, again, is the string provided by add().
get_location_mod_time ($location)
get the current modification
date of a location for dependency checking. The location, again, is
in the format of the string provided by add().
Notes:
If you want add() to read the content immediately, call
$self->{parent}->add_text ($name, $text, $self->{src},
                              $modtime)
.
add() can defer opening and reading content chunks straight away.
If it calls $self->{parent}->add_location ($name, $location,
$lastmod), providing a location string which starts with the data
source's protocol identifier, the content will not be loaded until
it is needed, at which point get_location_contents() is called.
This location string should contain all the information needed to
access that content chunk later, even if add() was not been
called. Consider it as similar to a URL. This is required so that
get_location_mod_time() (see below) can work.
All implementations of add() should call $fixed =
$self->{parent}->fixname ($name); to modify the name of each
content chunk appropriately, followed by
$self->{parent}->add_file_to_list ($fixed); to add the content
chunk's name to the filelist content item.
Data sources that support the <media> tag need to implement
get_location_url, otherwise an error message will be output.
Data sources that support the <contents> tag, and defer
reading the content until it's required, need to implement
get_location_contents, which is used to provide content from a
location set using $self->{parent}->add_location().
Data sources that support the <contents> tag need to implement
get_location_mod_time. This is used to support dependency
checking, and should return the modification time (in UNIX
time_t format) of that location. Note that since this is used
to compare the modification time of a content chunk from the
previous time webmake was run, and the current modification time,
this is called before the real data source is opened.
The <for> Tag
The <for> tag provides a quick way to iterate through a list of items.
It requires two attributes, name and values; the content item named
name is set to each space-separated value in the values string, and
the text inside the block is processed.
The name of the variable which will be set to each
value in the values list in turn (if you know your comp-sci
lingo, the iterator).
values
A space-separated list of values which is iterated
through.
namesubst
A Perl s/// substitution; each value in the values
list will be processed by this, if set.
Variable references to ${name} are processed immediately, so
you can use this variable inside another variable reference, like this:
${all_${name}_text} .
	<!-- Create output for files in top dir -->
	<for name="out" values="index contact work nonwork home">
	  <out file="${out}.html" name="${out}">
	    ${jmason_template}
	  </out>
	</for>
The <out> Tag
The <out> tag is used to generate output. Surprise!
It has one required attribute -- file, which defines the output file
generated by this section. In addition it has some optional attributes, as
follows:
name
which is used to substitute in that section's URL address, by
inserting it in other sections or out tags in a URL reference, like
so: $(out_foo) .
More optional attributes are as follows. These ones also pick up defaults
from the <attrdefault> tag.
format
which defines the format the output is expected in
(MIME-style). The default is text/html.
clean
specifies which features of the HTML cleaner
to use. The HTML cleaner is a powerful filter which can polish grotty,
messy HTML into fully-standards-compliant glory. The default value
is all.
ismainurl
Whether this output file should be used as a "main
URL" for any content items used within it, to support the url magic
metadatum. If you plan to have multiple output styles for
your content, be sure to set "ismainurl=false" on the pages which use
"alternative" styles. The default value is true.
Perl code can also access out URLs using the get_url() function.
The production of multiple out files that are more-or-less identical can be
automated using the <for> tag.
Out files will not be generated if the resulting text has not changed from the
previous run, or if the content sections it depends on have not changed.
The latter functionality is accomplished by caching the modification dates of
each file from which content was read to generate the output file. If:
the output file exists,
none of the files are newer than they were last time the output
file was written,
none of them are newer than the output file itself, and
none of the content items contain dynamic content, such as Perl
code or sitemaps,
then it does not need to be rebuilt.
Note: the -r switch to webmake, or the risky_fast_rebuild
option to the HTML::WebMake::Main constructor, indicates that
WebMake can take some risks when rebuilding. If this is on, then
step 4. from the list above is ignored.
The <sitemap> tag is used to generate a content item containing a map,
in a tree structure, of the current site.
It does this by traversing every content item you have defined, looking for
one tagged with a isroot=true attribute. This will become the root of the
site map tree.
While traversing, it also searches for content items with a metadatum called up. This is used to tie all the content together into a
tree structure.
Note: content items that do not have an upmetadatum are considered
children of the root by default. If you do not want to map a piece of
content, declare it with the attribute map=false.
By default, the content items are arranged by their score and title metadata
at each level. The sort criteria can be overridden by setting the
sortorder attribute.
Note: if you wish to include external HTML pages into the sitemap, you
will need to load them as URL references using the <media> tag and use
the <metatable> tag to associate metadata with them.
t/data/sitemap_with_metatable.wmk in the WebMake test suite demonstrates
this. This needs more documentation (TODO).
The <sitemap> tag takes the following required attributes:
name
The name of the sitemap item, used to refer to it
later. Sitemaps are referred to, in other content items or in out
files, using the normal ${foo} style of content reference.
node
The name of the template item to evaluate for each
node with children in the tree. See Processing, below.
leaf
The name of the template item to evaluate for each leaf
node, ie. a node with no children, in the tree. See Processing,
below.
And the following optional attributes:
rootname
The root content item to start traversing at. The
default root is whichever content item has the isroot attribute
set to true.
all
Whether or not all content items should be mapped.
Normally dynamic content, such as metadata and perl-code-defined
content items, are not included. (default: false)
dynamic
The name of the template item to evaluate for
dynamic content items, required if the all attribute is set
to true.
grep
Perl code to evaluate at each step of the tree.
See the Grep section below.
sortorder
A sort string specifying what metadata
should be used to sort the items in the tree, for example "section
score title".
Note that the root attribute is deprecated; use rootname instead.
The sitemap can be declared either as an empty element, with /> at the
end, or with a pair of starting and ending tags and text between. If the
sitemap is declared using the latter style, any text between the tags will be
prepended to the generated site map. It's typically only useful if you wish
to set metadata on the map itself.
Here's the key to sitemap generation. Once the internal tree structure of the
site has been determined, WebMake will run through each node from the root
down up to 20 levels deep, and for each node, evaluate one of the 3 content
items named in the <sitemap> tag's attributes:
node: For pages with pages beneath them;
leaf: For "leaf" pages with no pages beneath them;
dynamic: For dynamic content items, defined by perl code
or metadata.
By changing the template content items you name in the tag's attributes, you
have total control over the way the sitemap is rendered. For efficiency,
these should be declared using the <template> tag instead of the
<content> tag.
The following variables (ie. content items) are set for each node:
The grep attribute is used to filter which content items are included in
the site map.
The "grep" code is evaluated once for every node in the sitemap, and $_
is the name of that node; you can then decide to display/not display it, as
follows.
$_ is set to the current content item's name. If the perl code returns 0,
the node is skipped; if the perl code sets the variable $PRUNE to 1, all
nodes at this level and below are skipped.
If you're still not sure how it works, take a look at examples/sitemap.wmk
in the distribution. Here's the important bits from that file.
Firstly, two content items are necessary -- a template for a sitemap node, and
a template for a leaf. Note the use of $(url),
${title}, etc., which are filled in by the sitemap code.
	<content name=sitemapnode map=false>
	  <li>
	    <a href=$(url)>${title}</a>: $[${name}.abstract]<br>
	    <!-- don't forget to list the sub-items -->
	    <ul> ${list} </ul>
	  </li>
	</content>
And the template for the leaf nodes. Note that the ${list}
reference is not needed here.
This documentation includes a sitemap, by the way. It's used to generate
the navigation links. Take a look here.
The <navlinks> Tag
A common site structure strategy is to provide Back, Forward and
Up links between pages. This is especially frequent in papers or
manuals, and (as you can see above) is used in this documentation.
WebMake supports this using the <navlinks> tag.
To use this, first define a sitemap. This tells WebMake how to order the page
hierarchy, and which pages to include.
Next, define 3 templates, one for previous, one for next and one
for up links. These should contain references to ${url}
(note: not$(url)), which will be replaced with the URL for
the next, previous, or parent content item, whichever is applicable for the
direction in question.
Also, references to ${name} will be expanded to the name of the
content item in that direction, allowing you to retrieve metadata for that
content like so: $[${name}.title] .
You can also add templates to be used when there is no previous,
next or up content item; for example, the "top" page of a site has
no up content item. These are strictly optional though.
Then add a <navlinks> tag to the WebMake file as follows.
The content text acts just like a normal content item, but references to
${nexttext}, ${prevtext} or ${uptext}
will be replaced with the appropriate template; e.g. ${uptext}
will be replaced by either ${uptemplatename} or
${nouptemplatename} depending on if this is the top page or
not.
You can then add references to $[mynavlinks] in
other content items, and the navigation links will be inserted.
Note:navlinks content items must be included as a deferred
reference!
This will generate an extremely simple set of <a href> links, no frills.
The sitemap it uses isn't detailed here; see the sitemap documentation for details on how to make a site map.
The "breadcrumb trail" is a piece of navigation text, displaying a list of
the parent pages, from the top-level page right down to the current page.
You've probably seen them before; take a look at this Yahoo
category for an example.
To illustrate, here's an example. Let's say you're browsing the Man Bites
Dog story in an issue of Dogbiting Monthly, which in turn is part of the
Bizarre Periodicals site. Here's a hypothetical breadcrumb trail for that
page:
Bizarre Periodicals : Dogbiting Monthly : Issue 24 : Man
Bites Dog
Typically those would be links, of course, so the user can jump right back to
the contents page for Issue 24 with one click.
If you have a site that contains pages that are more than 2 levels deep from
the front page, you should consider using this to aid navigation.
To use a breadcrumb trail, first define a sitemap. This tells WebMake how to
order the page hierarchy, and which pages to include.
Next, define a template to be used for each entry in the trail. This
should contain references to ${url} (note: not$(url)), which will be replaced with the URL for the page in
question; and ${name}, which will be expanded to the name of the
"main" content item on that page, allowing you to retrieve metadata for that
content like so: $[${name}.title] .
Note: the "main" content item is defined as the first content
item on the page which is not metadata, not perl-generated code, and
has the map attribute set to "true", ie. not a template.
You can also define two more templates to be used at the top of the
breadcrumb trail, ie. the root page, and at the tail of it, ie. the
current page being viewed. These are optional though, and if not specified,
the generic template detailed above will be used as a default.
Then add a <breadcrumbs> tag to the WebMake file as follows.
The top and tail attributes are optional, as explained above.
The level attribute, which names the "generic" breadcrumb template
item to use for intermediate levels, is mandatory.
You can then add references to $[mycrumbs] in
other content items, and the breadcrumb-trail text will be inserted. Note!
be sure to use a deferred reference, or the links may not appear!
This will generate an extremely simple set of <a href> links, no frills.
The sitemap it uses isn't specified here; see the sitemap tag documentation for details on how to generate a site map.
WebMake has been run, and at least one file
has been generated. (The list of files generated can be retrieved
using the ${WebMake.ChangedFiles} variable.)
The body of this tag must be a block of perl code, which will be run
if and when the event occurs.
  <action event="site_changed"><{perl

	print "site was modified\n";

  }></action>
Defining Tags
Like Roxen or Java Server Pages, WebMake allows you to define your own tags;
these cause a perl function to be called whenever they are encountered in
either content text, or inside the WebMake file itself.
You do this by calling the define_tag() function from
within a <{perl}> section in the WebMake file. This
will set up a tag, and indicates a reference to the handler function to call
when that tag is encountered, and the list of attributes that are required to
use that tag.
Any occurrences of this tag, with at least the set of attributes defined in
the define_tag() call, will cause the handler function to be called.
Handler functions are called as fcllows:
handler ($tagname, $attrs, $text, $perlcodeself);
Where $tagname is the name of the tag, $attrs is a reference
to a hash containing the attribute names and the values used in the tag, and
$text is the text between the start and end tags.
$perlcodeself is the PerlCode object, allowing you to write proper
object-oriented code that can be run in a threaded environment or from
mod_perl. This can be ignored if you like.
Note that there are two variations, one for conventional tag pairs with a
start and end tag, the other for stand-alone empty tags with no end tag. The
latter variation is called define_empty_tag().
Initially, WebMake used a set order of tag parsing, but this proved to be
unwieldy and confusing. Now, it uses the order in which the tags are defined
in the .wmk file, so if you want tag A to be interpreted before tag B, put A
before B and the right thing will happen.
Perl code embedded inside the WebMake file, using <{perl}> processing directives, will be evaluated there
and then (unless the <{perl}> block is embedded in another block, such
as a content item or <out> file block).
This means that you can define content items by hand, search for other content
items using a <contents> tag, and then use a <{perl}> section to define a list of all content items
which satisfy a particular set of criteria.
This list can then be used in later <{perl}> blocks, content references, or <for> tags.
Once the file is fully parsed, the <out> tags are
processed, one by one.
At this point, content references, <{set}> tags, and
<{perl}> processing directives will be interpreted,
if they are found within content chunks. Finally, deferred content references
and metadata references are expanded.
Eventually, no content references, <{set}> tags, <{perl}> processing directives, metadata references, or
URL references are left in the file text. At this point, the file is written
to disk under a temporary name, and the next output file is processed.
Once all output files are processed, the entire set of files which have
been modified are moved into place, replacing any previous versions.
The <{set}> Directive
Small pieces of content can be set from within other content chunks or
<out> sections using the <set> directive. The format is
<{set name="value"}>
This can be useful to set small chunks of text, by including a <{set}> directive in the content item that uses them.
For example, a common use of <{set}> is to define, ahead of
time, what text should be inserted into a template:
The processing of content references starts at each <out> URL in turn, and descends from the chunk of text
defined for that file, replacing each ${content_ref} and $(url_ref) one-by-one, in a depth-first manner.
Finally, the tree-traversal starts again from the chunk of <out> text,
searching for $[deferred_content
refs].
Therefore if you wish to <{set}> a variable, let's say x, in a chunk
of content that will not be loaded before x is accessed, you should use
a $[deferred content ref] to
access it.
The <{set}> directive was implemented before metadata was, and initially
provided a way to do similar things, such as substitute page titles, etc.
Now, however, it's probably better to use <wmmeta> tags to
handle data that is associated with a content-item. Using <wmmeta> tags
means your pages will be able to take advantage of new features, like index
and site-map generation.
The <{set}> directive is retained as a way of quickly setting content
items from within other content, in case this feature proves useful for other
purposes.
The <{perl}> Directives
Arbitrary perl code can be executed using this directive.
It works like perl's eval command; the return value from the perl block is
inserted into the file, so a perl code block like this:
	<{perl
	  $_ = '';
	  for my $fruit (qw(apples oranges pears)) {
	    $_ .= " ".$fruit;
	  }
	  $_;
	}>
will be replaced with the string " apples oranges pears". Note that the
$_ variable is declared as local when you enter the perl block,
you don't have to do this yourself.
If you don't like the eval style, you can use a more PHP/JSP/ASP-like
construct using the perlout directive, which replaces the perl code text
with anything that the perl code prints on the default output filehandle, like
so:
	<{perlout
	  for my $fruit (qw(apples oranges pears)) {
	    print " ", $fruit;
	  }
	}>
Note that this is not STDOUT, it's a local filehandle called $outhandle.
It is selected as the default output handle, however, so just print
without a filehandle name will work.
Also, it should be noted that perl is a little more efficient than
perlout, so if you're going all-out for speed, you should use that.
<{perl}> sections found at the top level of the
WebMake file will be evaluated during the file-parsing pass, as they
are found.
<{perl}> sections embedded inside content chunks
or other tagged blocks will be evaluated only once they are referenced.
The library functions are available both as normal perl functions in the
default main package, or, if you want to write thread-safe or mod_perl-safe
perl code, as methods on the $self object. The $self
object is available as a local variable in the perl code block.
A good example of perl use inside a WebMake file can be found in the
news_site.wmk file in the examples directory.
Sorting Lists of Content Items
Frequently, you will need to get a list of content items in sorted order.
WebMake itself does this for the sitemap tag, among others.
Sorting is typically performed using a content item's metadata; some metadata
that are especially useful are:
score
A number representing the "priority" of a content
item; specifically intended for use when sorting. Defaults to 50
if unset.
title
The title of a content item. Handy for alphabetic
lists. Defaults to (Untitled) if not set.
declared
The item's declaration order. This is a number
representing when the content item was first encountered in the
WebMake file; earlier content items have a lower declaration order.
You do not need to set this; WebMake will do so automatically.
mtime
The modification date, in UNIX time_t
seconds-since-the-epoch format, of the file the content item was
loaded from.
name
The name of the content item.
WebMake provides a built-in mechanism to allow easy sorting of content items,
called a sort spec or sort string.
This is typically used either with the Perl code library's
sort_content_objects() call, or using a
sortorder attribute as the sitemap tag does.
A sort string is a text string, containing a space-separated list of metadata
items. The first entry in the list is the main sorting criterion; the second
entry is then used to break deadlocks if two entries match for the main
criterion, etc.
In addition, a metadata item can be prefixed with a !, to reverse its
order.
These are perl-style regular expressions. They are differentiated
from glob patterns by prefixing them with RE:, for example:
RE:^.*\.html$.
An introduction to regular expressions is beyond the scope of this
documentation. For more details, check your perl documentation, or search the
web.
Scraped Templates
This is a very neat trick. A common problem with templating systems, such as
WebMake, is that they don't actually help at all in certain areas.
Here's one of the problems. When a HTML Guy edits up a page template, he's
typically going to edit an entire page, not just small snippets;
he has to see what the overall page looks like, align the items correctly,
make sure that font looks OK with that font, that bgcolor with that bgcolor,
etc.
However, as Talin mentions in this thread on Advogato,
there's a problem: most large web sites use the notion of "components" -
that is, re-usable fragments of dynamic HTML which are assembled to form a
complete page.
So once the HTML Guy has designed up a good-looking, nice page to display "a
list of top 10 selling movies on a site that sells VHS tapes", as the example
in the Advo article suggests, the page now contains the following templates:
overall page template
top-10 page content
top-10 list table template
one-row-of-the-table template (which could in turn be broken down
into 2 templates: one for odd rows, one for even, etc.)
So someone has to go and cut up the page the HTML Guy has created, into
components (template and content items, in WebMake terminology). What a pain.
Content "src" attribute: templates can be loaded from a named
file (or even a remote webpage). Multiple templates or content
items can be loaded from the same file.
Pre-processing: Using the preproc attribute, you can specify
a block of perl code to execute over each content item's text.
Scraping: The scrape_xml() and scrape_out_xml() perl code
library functions allows you to easily cut out the bits of the page you
want, based on patterns in the page text or HTML.
What you need to do is isolate -- or specify to the HTML Guy -- some patterns
in the text that delimit the areas of the page, which you will be turning
into templates. You then set up WebMake commands which will scrape the
templates from the designer-provided page.
Let's go with the 'top-10 videos on VHS' list page example from the Advogato
thread. That contains the following templates:
overall page template
top-10 page content (text, images maybe etc.)
top-10 list table template
one-row-of-the-table template (which could in turn be broken down
into 2 templates: one for odd rows, one for even, etc.)
Let's say the designer has provided you with this page, called "top10.htm"
(hopefully he's filled in the ... bits, of course!):
    <html>
      <head>
      <title>Top 10 Movies on VHS</title>
      </head><body>

      .... blah blah navigation, other generic-page-template stuff ...

      <!-- start of top-10 page content -->

      Lorem ipsum dolor sit amet, consectetaur adipisicing elit, sed do
      eiusmod tempor incididunt ut labore et dolore magna aliqua. Ut enim
      ad minim veniam, quis nostrud exercitation ullamco laboris nisi ut
      aliquip ex ea commodo consequat. ...

      <!-- start of top-10 table -->
      <table bgcolor=nice etc.>

	<!-- start of even row -->
	<tr>
	  <td>....</td> <td>....</td> <td>....</td>
	</tr>
	<!-- end of even row -->

	<!-- start of odd row -->
	<tr>
	  <td>....</td> <td>....</td> <td>....</td>
	</tr>
	<!-- end of odd row -->

      </table>
      <!-- end of top-10 table -->

      <!-- end of top-10 page content -->

      .... blah blah more generic-page-template stuff ....
      </body>
    </html>
We can see that the following content or template items can be scraped
out:
overall page template: everything between the html tags, but with
text from start of top-10 page content to end of top-10 page
content stripped out
top-10 page content: start of top-10 page content to end of
top-10 page content, strip out top-10 table section
top-10 list template: top-10 table, strip out even row
and odd row sections
even-table-row template: even row
odd-table-row template: odd row
That translates into this WebMake code:
  <{perl        # define the scraping functions we will use.

  sub scrape_page_template {
    return scrape_out_xml (shift
        qr/start of top-10 page content/i, qr/end of top-10 page content/i);
  }

  sub scrape_top10_content {
    my $text = scrape_xml (shift,
        qr/start of top-10 page content/i, qr/end of top-10 page content/i);
    return scrape_out_xml ($text,
        qr/start of top-10 table/i, qr/end of top-10 table/i);
  }

  sub scrape_top10_list_template {
    my $text = scrape_xml (shift,
        qr/start of top-10 table/i, qr/end of top-10 table/i);
    $text = scrape_out_xml ($text,
        qr/start of even row/i, qr/end of even row/i);
    return scrape_out_xml ($text,
        qr/start of odd row/i, qr/end of odd row/i);
  }

  sub scrape_top10_even_row_template {
    return scrape_xml (shift, qr/start of even row/i, qr/end of even row/i);
  }

  sub scrape_top10_odd_row_template {
    return scrape_xml (shift, qr/start of odd row/i, qr/end of odd row/i);
  }

  # (Note the qr// for the search patterns use the 'i' modifier;
  # non-programmers love to mess with capitalisation ;)

  '';           # replace this perl block with an empty string

  }>

  <!-- and now define the templates, using those functions: -->
  <template name="page_template" src="top10.htm"
                          preproc=scrape_page_template></template>
  <content name="top10_content" src="top10.htm"
                          preproc=scrape_top10_content></content>
  <template name="top10_list_template" src="top10.htm"
                          preproc=scrape_top10_list_template></template>
  <template name="top10_even_row_template" src="top10.htm"
                          preproc=scrape_top10_even_row_template></template>
  <template name="top10_odd_row_template" src="top10.htm"
                          preproc=scrape_top10_odd_row_template></template>
That's it. Those templates can now be used safely in the site logic,
and will work as long as the page designer doesn't muck about with
the comments too much.
You don't have to use comments, by the way; if your HTML Guy's editor allows
him to mark out "zones" of a page in some way, then just use whatever zone
markers it provides instead, or even just use patterns in the HTML tags or
text.
If you wish to refer to a content item or variable, but are not sure if it
exists, you can provide a default value by following the content name
with a question mark and the default value.
Content references can also be parameterised references; this means
that they act like function calls, in a way, allowing you to pass
in parameters. They look like this:
${name: parameter="value" ...}
The parameters are declared in the XML style.
Note: the parameters' values must not contain further content
references, due to a limitation in the way WebMake parses
content refs. If you want to refer to a content item from
within a template, pass in the name of the content item,
and get the template to expand it; see the example below.
For example, if you set up a template item like this:
	<template name="mytemplate">
		You passed in ${name}, and its value is \"${${name}}\".
	</template>
and a content item like this:
	<content name="foo">
		Hi, I'm foo!
	</content>
Then a reference to:
${mytemplate: name="foo"}
will expand to:
**You passed in foo, and its value is \"Hi, I'm foo!\".
$(url_refs) - References to URLs
URLs of defined <out> sections and <media> items can be inserted
into the current content using this reference format.
$(name)
Note that all URL references are written relatively; so a file created in the
foo/bar/baz subdirectory which contains a URL reference to
blah/argh.html will be rewritten to refer to ../../../blah/argh.html.
Again, if you're not sure a URL exists, a default value can be supplied,
using this format:
Everyone is familiar with data, but the term meta-data is not so familiar.
Here's a brief primer.
To illustrate, I'll use an example familiar to most readers. Most computer
operating systems nowadays have the concept of files in a filesystem. If you
consider the files as data, then details such as file size, modification
times, username of the owner etc. are metadata, ie. data about the files.
In WebMake, metadata is used to refer to properties of textual content items.
For example, a newspaper article may have a title, an abstract (ie. a
brief summary), etc.
This kind of data is very useful for building indices and catalogues, in the
same way that Windows Explorer or the UNIX ls(1) command uses filesystem
metadata to display file listings. As a result, a good way to think of it is
as "catalog data", as opposed to "narrative data", which is what a normal
content item is. (thanks to Vaibhav Arya, vaibhav /at/ mymcomm.com, for that
analogy.)
To extend this metaphor, you should use metadata for anything that would be
used to describe your pages in a catalog. For example, given the page
title, a quick abstract of the page, and a number to indicate its importance
relative to other pages, one could easily create a list of pages
automatically. In fact, this is how the indexes in the WebMake documentation
are generated, and it's how sitemaps, breadcrumb trails and site trees are
implemented.
WebMake can load metadata from a number of sources:
Inferred from the content text itself: WebMake supports
"magic" metadata, which contains some inferred data about the
content, such as its last modification date (which can be inferred
from the filesystem storage of the content file itself). In
addition, title metadata can be inferred from several sources, such
as the <title> tag in HTML, or =head1 tags in POD
text.
Tags embedded within the content text: This is handled
using the <wmmeta> tag.
Set as defaults before the content items are defined: the
<metadefault> WebMake tag.
Defined in bulk and "attached" to the content items: the
<metatable> tag.
Where content is the name of the content item, and metaname is the
name of the metadatum. So, for example, $[blurb.txt.title]
would return the title metadatum from the content item blurb.txt.
Meta tag names are case-insensitive, for compatibility with HTML meta tags.
Any content chunk can access metadata from other content chunks within the
same <out> tag, using this as the content name, i.e.
$[this.title] . This is handy, for example, in setting the
page title in the main content chunk, and accessing it from the header chunk.
If more than one content item sets the same item of metadata inside the
<out> tag, the first one will take precedence.
The example files "news_site.wmk" and "news_site_with_sections.wmk"
demonstrate how meta tags can be used to generate a SlashDot or Wired
News-style news site. The index pages in those sites are generated
dynamically, using the metadata to decide which pages to link to, their
ordering, and the titles and abstracts to use.
WebMake provides extra support for metadata in an efficient way. A
metadatum is like a normal content item, except it is exposed to all other
pages in the WebMake file. This data is accessible, both to other pages in
the site (as $[contentname.metaname]), and to other
content items within the same page (as
$[this.metaname]).
In addition, WebMake caches metadata in the site cache file between runs, so
that a subsequent partial site build will not require loading all the content
text, just to read a page title.
Note that content items representing metadata cannot, themselves, have
metadata.
The items marked (built-in) are supported directly inside WebMake, and used
internally for functionality like building site maps and indices. All the
other suggested metadata names here are just that, suggestions, which support
commonly-required functionality.
Also note that the names are case-insensitive, they're just capitalised here
for presentation.
Title
the title of a content item. The default title for
content items is inferred from the content text where possible,
or (Untitled) if no title can be found. (built-in)
Score
a number representing the "priority" of a content
item; used to affect how the item should be ranked in a list of
stories. The default value is 50. Items with the same score will
be ranked alphabetically by title. (built-in)
Abstract
a short summary of a content item.
Up
used to map the site's content; this metadata indicates the
content item that is the parent of the current content item. This metadatum
is used to generate dynamic sitemaps. (built-in)
Section
the section of a site under which a story should be
filed.
Author
who wrote the item.
Approved
has this item been approved by an editor; used to
support workflow, so that content items need to be approved before
they are displayed on the site.
Visible_Start
the start of an item's "visibility window",
ie. when it is listed on an index page. (TODO: define a recommended
format for this, or replace with DC.Coverage.temporal)
Visible_End
the end of an item's "visibility window",
ie. when it is listed on an index page.
DC.Publisher
a Dublin Core metadatum. The organisation or
individual that publishes the entire site.
The Dublin Core is a whole load of suggested metadata names and formats,
which can be used either to replace or supplement the optional metadata named
above. Regardless of whether you replace or supplement the metadata above
internally, it is definitely recommended to use the DC names for metadata
that's made visible in the output HTML through conventional HTML <meta>
tags.
These are some built-in "magic" items of metadata that do not need to be
defined manually. Instead, they are automatically inferred by WebMake itself:
declared
the item's declaration order. This is a number
representing when the content item was first encountered in the
WebMake file; earlier content items have a lower declaration order.
Useful for sorting.
url
the first <out> URL which contains that content
item (you should order your <out> tags to ensure each stories'
"primary" page is listed first, or set ismainurl=false on the
"alternative" output pages, if you plan to use this). See also the
get_url() method on the HTML::WebMake::Content object.
is_generated
0 for items loaded from a <content> or
<contents> tag, 1 for items created by Perl code using the
add_content() function.
mtime
The modification date, in UNIX time_t
seconds-since-the-epoch format, of the file the content item was
loaded from. Handy for sorting.
It is used by Midgard and Microsoft's SiteServer, and is available as
user-contributed code for Manila. It provides copious benefits
for flexible index and sitemap generation, and, with the addition of an
Approved tag, adds initial support for workflow.
WebMake can load meta-data directly from the content text,
using the <wmmeta> tag.
This tag is automatically stripped from the content when the content is
referenced. It can be used either as an XML-style empty tag, similar to the
HTML <meta> tag, if it ends in />:
  <content name="foo">
    < wmmeta name="Title" value="Foo" />
    < wmmeta name="Abstract">
      Foo is all about fooing.
    </ wmmeta>

    Foo foo foo foo bar. etc.
  </content>
The <metatable> Tag
Metadata is usually embedded inside a content item using the <wmmeta>
tag. However, sometimes you may want to tag a content item with metadata from
outside, if the text of the content is not under your control; or you may want
to tag metadata to an object that is not text-based, such as an image.
The metatable tag allows you to do this, and in bulk. You list a table of
content names and the metadata you want to attach to each content item, in
tab-, comma-, pipe-separated-value, or XML format.
By default, the table is read from between the <metatable> and
</metatable> tags. However, if you set the src attribute,
the table will be read from the location specified, instead.
Use the format attribute to specify whether the metatable is in
XML (xml) or Delimiter-Separated-Value (csv) format.
Firstly, pick a delimiter character, such as |. Set the delimiter
attribute to this character.
Next, the first line of the metatable lists the metadata you wish to set; it
must start with the value .. This indicates to WebMake that it's
defining the metadata to be set.
Finally, list as many lines of metadata as you like; the first value on the
line is the name of the content item you wish to attach the metadata to. From
then on, the other values on the line are the values of the metadata.
So, for example, consider this table, from the WebMake documentation:
The XML block is surrounded with a <metaset> tag, and contains
<target> blocks naming the content items the enclosed metadata items are
associated with.
Inside the <target> blocks, <meta> tags name each metadatum, and
enclose the metadatum's value.
        <metaset>
          <target id="foo.txt">
            <meta name="title">
              This is Foo.txt's title.
            </meta>
          </target>
        </metaset>
Previously, WebMake required you to create phoney content items, in order to
tag metadata onto images or other non-content items. This is no longer
required. Just load the URLs of the items using a <media>
tag, and each one will have a "phoney" content item created with the same
name automatically.
Then use a metatable, as above, to set the metadata you wish to use.
The <metadefault> Tag
Metadata is usually embedded inside a content item using the <wmmeta>
tag. However, this can be a chore for lots of content items, so to make
things easier, you can specify default metadata settings, using the
<metadefault> tag.
Specify this tag before the content items in question, and those content items
will all be tagged with the metadata you set.
Like the attrdefault tag, this tag can be used either in a
scoped mode, or in a command mode.
Command mode uses standalone tags (<metadefault ... />); the
metadata are set until the end of the WebMake file, or until you change
them with another <metadefault> tag.
Attributes are usually specified inside a content item's <content> or <contents> tags, or, for output files, inside
the <out> tag. However, this can be a chore if you have many
items to set attributes on, so, to make things easier, you can specify default
attributes using the <attrdefault> tag.
Specify this tag before the content items or output files in question, and
those items will all be tagged with the attributes you set.
Like the metadefault tag, this tag can be used either in a
scoped mode, or in a command mode.
"Scoped" mode uses opening (<attrdefault>) and closing
(</attrdefault>) tags; the attributes are only set on content items
or output files between the two tags.
Command mode uses standalone tags (<attrdefault ... />); the
attributes are set until the end of the WebMake file, or until you change
them with another <attrdefault> tag.
By default, WebMake includes some named metadata you can use, such as
Title, Author, and Score. Each of these can have a type (numeric
or string), and a default value.
You can also use your own, arbitrary names for metadata, but they won't
get a type or a default value.
The <metaset> tag allows you to define a set of metadata, assign an id
to that set, and set default values and types for them.
You then surround the parts of your WebMake file which uses these sets
in a <usemetaset> block.
The ${WebMake.*} Magic Variables - information about the environment WebMake is run in, such as the version of WebMake, the timestamp, the user who ran it, etc.
The ${IMGSIZE} Magic Variable
This reference provides an easy way to automatically add image size
information to an <img> tag, for example:
<img src="foo.gif" ${IMGSIZE}>
Would become:
<img src="foo.gif" height=30 width=11>
It requires the Image::Size Perl module be installed, otherwise
it does nothing.
The $(TOP/) Magic Variable
This URL reference always evaluates to a relative path to the top-level of the
site, for URLs.
Note that setting the EtTextHrefsRelativeToTop option will cause all URLs
in Text::EtText blocks, which don't start with a slash or a protocol
specification, to be made relative to the top-level of the site.
The ${WebMake.*} Magic Variables
WebMake defines several magic variables that expand to useful information about
the current environment. These are as follows. Each one is illustrated with
the value at the time this documentation was generated.
WebMake.Version
The version of WebMake
that generated this site. (2.4)
WebMake.GeneratorString
A generator string for
WebMake; this is in the form WebMake/v.vv where v.vv
is the version number of WebMake. (WebMake/2.4)
WebMake.Who
The username of the person who generated
the site. (jm)
WebMake.Time
The time the site was last generated.
(
Tue Aug 09 04:38:33 2005
)
WebMake.OutFile
The filename used in the current <out> tag.
(allinone.html)
WebMake.OutName
The name used in the current <out> tag.
(allinone)
WebMake.PerlLib
The directory WebMake expects to find
Perl code library files (ie. plugins) in. (/usr/share/perl5/HTML/WebMake/PerlLib)
A space-separated list of filenames,
listing the files that actually have been generated on this run, so
far, not including the current output file, if there is one.
()
This converter converts from Text::EtText, a simple plain-text format, to
HTML. Like most simple text markup formats (POD, setext, etc.), EtText markup
handles the usual things: insertion of <P> tags, header recognition,
list recognition, and markup. However it adds a powerful link markup system.
EtText is no longer included in WebMake; instead it must be downloaded
separately from http://ettext.taint.org/, where there is also a more detailed
set of documentation.
The POD Format Converter
This converter converts from POD to HTML, using Tom Christiansen's
Pod::Html module.
POD is a powerful, but simple, editable-text format for marking up
manual-page-style documentation. See the "perlpod" manual page in your Perl
documentation for more information on the POD format.
Things to watch out for in WebMake's support for POD:
Anything before the <BODY> tag, or after the </BODY>
tag, in the generated output is stripped, so that the POD output can be
embedded in HTML pages without requiring a page of its own.
WebMake allows options to pod2html to be specified using
the podargs attribute of the <content> tag; see below.
If you are reading POD documentation embedded inside other files,
you should probably use the "asis" attribute on the content items in
question, otherwise all sorts of wierd things could happen as WebMake tries
to interpret Perl variable references and so on! See the <content> documentation for details on "asis".
Depending on the version of Perl you have installed, the HTML produced by
pod2html may not be valid XHTML; it may contain some "old-style" HTML
tags used in a standalone manner instead of as tag-pairs. Old versions of
Perl will, as a result, cause some "unbalanced tag" warnings from the HTML
cleaner.
The HTML cleaner is a powerful filter which can polish grotty, messy HTML into
fully-standards-compliant glory. By default, all output of format
text/html (the default format) will be passed through it.
It is controlled using the clean parameter of the <out> tag.
The features to be used should be listed in this parameter's value, separated
by whitespace.
Here are the features available:
pack - Compress the HTML, removing all white space that is not
part of an attribute's value, or inside <xmp> or <pre> tags.
indent - "Pretty-print" the HTML, indenting tags appropriately,
except for text and markup inside <xmp> or <pre> tags.
nocomments - Trim all comments.
addimgsizes - Add image sizes to <img> tags if they do not
already specify them.
cleanattrs - Quote all attributes in opening tags, and lowercase
all tag names.
addxmlslashes - Add XML-style slashes to the end of empty-element
tags, such as <hr>, <img> etc.
fixcolors - Fix colors that do not start with a # character, so that
they do.
The feature string all can be used to include all cleaning modes.
The default mode is pack addimgsizes cleanattrs addxmlslashes
fixcolors indent.
Using webmake.cgi - How to navigate and use the ''edit-in-browser'' interface
Using webmake.cgi
WebMake now provides some simple "edit in browser" functionality, using
webmake.cgi.
Note: this is beta functionality, and may have security implications. Use
with caution!
Some features of note:
The default view is an overview of your site, allowing you to quickly find
what you want to change.
webmake.cgi includes a rudimentary file manager, allowing you to travel
through the directories that make up your site, and create, delete, edit
and upload files therein.
Text and XML can be edited quickly, in a textbox, with built-in input
areas for entering common metadata items (such as titles).
You can also use it to edit the items of content embedded in the WebMake
file itself, or simply edit the WebMake XML file in a text box.
With a single click of a link, the WebMake site can be built there and
then.
Also, webmake.cgi supports CVS, which provides these benefits:
multiple copies of the same site can be replicated, and changes made on
any of the sites will be automatically updated on all the others.
changes made to the site will be kept under version control, so older
versions of the site can be "rolled back" if necessary.
a history of changes to the site is kept, allowing you to see exactly who
did what to which.
Installing webmake.cgi
To use this, copy or link webmake.cgi to your web server's cgi-bin
directory, and set it up as a password-protected area. Here's how this is
done with Apache:
  <Location /cgi-bin/webmake.cgi>
      <Limit GET PUT POST>
	Require valid-user
	AuthType Basic
	AuthName WebMake
	AuthUserFile /etc/httpd/conf/webmake.passwd
      </Limit>
  </Location>
Next, create the file /etc/httpd/conf/webmake.passwd. Example:
  htpasswd -c /etc/httpd/conf/webmake.passwd jm
  New password: (type a password here)
  Re-type new password: (again)
  Adding password for user jm
And edit the webmake.cgi script, changing the value for
$FILE_BASE. Only files and sites below this directory will be
editable.
Note that webmake.cgi runs with the web server's username and password,
so you may have to chown or chmod files for it to work.
If you attach metadata (e.g. titles) to images or other media items using
webmake.cgi, it will write that metadata to a file called metadata.xml
in the top-level directory of the site. To pick this up, you will need to add
the following <metatable> directive to your site:
This document covers setting up Webmake with CVS and SSH. It's quite
complicated, but the end result is worth it, providing version control and
replication of your site.
You will require a CVS server machine (one with a permanent internet connection
if possible). This is where the CVS repository will live. The repository is
the central store for all CVS-controlled documents.
Then you will need at least one client machine (it could be the same computer,
of course). Each client machine will have a copy of the website, checked out
from the CVS repository. Initially, you'll use one of the clients to import
the website into CVS.
The client machines need to be able to connect to the server machine over the
network; and if you're planning to use webmake.cgi, they need to be able to do
this without passwords. To do this securely, you'll need to set up an SSH
server and clients, and generate public/private key pairs. I'll cover some of
this where possible, but you need to be familiar with SSH in general.
(You don't strictly need to use SSH, but it allows multiple copies of the same
site across the net, and allows changes made on any of the sites to be
automatically replicated to all the others. This is obviously quite handy!
However, if you don't want to use SSH, you'll still get the benefits of keeping
the site under version control.)
WARNING: as part of this procedure, you will need to allow CGI scripts on the
client machine to run cvs commands on the server machine. If an attacker
subverted the client machine, they may be able to use this to gain shell
access to your account on the server machine. If this is a problem, it would
probably be better not to set up webmake.cgi.
When illustrating the commands needed to run this, I'll use my username and my
hostnames. Wherever you see jm, replace with your username, wherever you
see localhost, replace with your server's hostname, and wherever you see
/cvsroot, replace with the path to your CVS repository on the server.
On a client machine, install the SSH client ("ssh"), and install the SSH server
("sshd") on the server machine. Set them up (as described in the ssh
documentation).
Next, if you haven't done this before, generate an ssh key pair for yourself
on all machines:
ssh-keygen -P "" -N ""
When it asks for the filenames to save the keys in, hit Enter to accept the
defaults.
Any machines you plan to run webmake.cgi on, you will also need to generate a
key-pair for, so that the user the web server runs CGI scripts as will be able
to communicate without passwords. Here's how (run these as root):
This will generate a public/private key-pair for the web server user. Note
that the user the web server runs as on your UNIX may be different (httpd,
www, or nobody are common usernames for it); in that case replace
apache with the correct username.
Don't worry; the keys you've set up will not compromise your server's
security, as the SSH daemon will not allow anyone to log in as the web server
user, since they have a no-login shell.
This will allow CGI scripts on the client machine to access cvs on the server
machine. Add similar lines for any other machines which need access to the
CVS repository.
Make sure it's read-write only by you, and unreadable to anyone
else:
chmod 0600 ~/.ssh/authorized_keys
Setting up no-password logins for manual editing is similar -- but instead of
reading the public key from ~apache/identity.pub, read it from
~/.ssh/identity.pub, and leave out the command="command" part when
adding it to ~/.ssh/authorized_keys on the server-side.
Next, try it out. This is required to initialise the client account with a
host key for the server, and if you omit this step, the CGI script will not be
able to update or check in code.
echo test | su apache -s/bin/sh -c 'ssh jm@localhost cvs server'
It will ask you if you wish to accept the host key for server localhost.
Type "yes" and hit Enter. If all goes well, you should see:
error unrecognized request `test'
Important: you should not be prompted for a password. If you are prompted
for one, check that the correct key has been entered in the
authorized_keys file.
If possible, add this to your startup scripts (.bashrc or .cshrc), so
you can't forget to set it. All further CVS commands in this document
assume this environment variable is set.
Create a WebMake XML configuration file for the site, if one is not already
present. webmake.cgi will require that a site has a .wmk file.
Now, run the "webmake_cvs_import" script. This script is a wrapper around
the "cvs import" command which ensures that binary files (such as images
etc.) are imported into CVS correctly.
You need to provide a name for the CVS module. I'm using jmason.org in
this example. You should pick a name that makes sense; I typically use the
host name of the site I'm importing.
On the clients, create a directory for webmake.cgi to work in, in the web
server's HTML tree, then check out the CVS tree:
	mkdir /var/www/html/jmason.org
	cd /var/www/html/jmason.org
	cvs -d :ext:jm@localhost:/cvsroot checkout jmason.org
Note: cvs checkout has a few idiosyncrasies; notably, the directory you're
checking out must not exist in your filesystem, otherwise it will not populate
it with the CVS data files it requires to do check-ins and updates later.
Also, this directory must have the same name it has in the CVS repository
(jmason.org in the example above). We don't want that, so move them
nearer:
mv jmason.org/* . ; rmdir jmason.org
then, as root,
chown -R apache /var/www/html/jmason.org
so that webmake.cgi can read and write the files. (You could also chgrp them
to www or whatever the web server user uses as its gid, and chmod -R
g+w them.)
Next, copy the "webmake.cgi" script to your web server's cgi-bin directory:
cp webmake.cgi /cgi-bin/editsite.cgi
and edit the top of the script. You need to set these variables:
$FILE_BASE = '/var/www/html/jmason.org';
Note that if you've adopted the same convention as I use for the module name,
you can use _
_HOST_
_ as a shortcut in this line to mean the
hostname of the site being edited. This is handy, as it allows you to use the
same CGI script to edit multiple sites, in different virtual servers.
Load up http://localhost/cgi-bin/editsite.cgi in a web browser, and it
should have worked; you should see a list of "sites" (ie. .wmk files) to
choose from.
Try clicking on a site, scroll down to the bottom of the page, and click on
the "[Update From CVS]" link. You should see a page of cvs
messages, indicating that the site has been updated from the latest CVS
checked-in version.
If this works without errors, you're now set up. Set up as many more clients
as you like!
More info on CVS can be found here, and a good reference to using CVS
with web sites is available here.
Using webmake.cgi
First of all, after typing the webmake.cgi URL, you'll see a login dialog:
Type your username and password, and (assuming they're right) you'll see
the Choose Site page. Choose the site (ie. the .wmk file) you wish
to edit and click on its Edit link.
The site you've chosen will appear in the Edit Site page:
If you've set up CVS, it's probably good manners to ensure you do a cvs
update immediately before changing anything. If you click on the Update
From CVS link, you'll see the CVS Update page:
Once this is done, click on the return to WebMake file link to return to
the Edit Site page.
If you have any items that contain text, such as <content> items, an
Edit button will appear beside them. If you click this, you can edit the
text of that item, and any embedded metadata, in a textbox like so:
This allows you to edit the text of the item, and even upload new text from
your local disk, if you so wish. Hit the Save button to save the changes,
or just hit your browser's Back button to avoid saving.
The Edit Site page doesn't currently allow you to create new tags
in the WebMake file, or change parameters to WebMake tags. To do this,
use the Edit This File As Text link, which will present you with the
entire Webmake XML file in the Edit Page:
WebMake tags that load content from directories, such as the <contents>
tag, appear with a link beside them reading Browse Source Dir. If you
click this, you'll be presented with the Edit Directory file browser
window:
This allows you to navigate about the directory tree (although you cannot
go above the directory you've named as $FILE_BASE in the
webmake.cgi script), and perform some other operations, such as
editing files in the Edit Page, create new files, and delete files:
If you click the Build Site or Build Fully links on any of the
pages, WebMake will build the site and present you with what was built
(and what went wrong, if anything did!):
Once you're satisfied with the changes, hit the Commit Changes To CVS
link. This will, firstly, ask you for a message describing your changes:
And, once you've provided that, will send your changes back to the
CVS server.
Note that WebMake tracks any files you've added or deleted using hidden CGI
variables, so once you've done a commit, you're given a choice between
clearing out this list (if the commit was successful), or keeping them (if it
failed in some way).
Get the filename or datasource location that this content was loaded from.
Datasource locations look like this:
proto:protocol-specific-location-data, e.g. file:blah/foo.txt or
http://webmake.taint.org/index.html.
Expand a content item, as if in a curly-bracket content reference. If the
content item has not been expanded before, the current output file will be
noted as the content item's ''main'' URL.
The metadatum is converted to its native type, e.g. score is return as an
integer, title as a string, etc. If the metadatum is not provided, the
default value for that item, defined in HTML::WebMake::Metadata, is used.
Note that this method should only be called from a deferred reference, as
metadata often isn't available until all the normal content references in the
current page have been expanded.
Returns the content item's declaration order. This is a number representing
when the content item was first encountered in the WebMake file; earlier
content items have a lower declaration order. Useful for sorting.
Get a content item's URL. The URL is defined as the first page listed in the
WebMake file's out tags which refers to that item of content.
Note that, in some cases, the content item may not have been referred to yet by
the time it's get_url() method is called. In this case, WebMake will insert a
symbolic tag, hold the file in memory, and defer writing the file in question
until all other output files have been processed and the URL has been found.
WebMake is a simple web site management system, allowing an entire site to be
created from a set of text and markup files and one WebMake file.
It requires no dynamic scripting capabilities on the server; WebMake sites can
be deployed to a plain old FTP site without any problems.
It allows the separation of responsibilities between the content editors, the
HTML page designers, and the site architect; only the site architect needs to
edit the WebMake file itself, or know perl or WebMake code.
A multi-level website can be generated entirely from 1 or more WebMake files
containing content, links to content files, perl code (if needed), and output
instructions. Since the file-to-page mapping no longer applies, and since
elements of pages can be loaded from different files, this means that standard
file access permissions can be used to restrict editing by role.
Since WebMake is written in perl, it is not limited to command-line invocation;
using the HTML::WebMake::Main module directly allows WebMake to be run from
other Perl scripts, or even mod_perl (WebMake uses use strict throughout,
and temporary globals are used only where strictly necessary).
Force the cached metadata and dependency data for the site to be rebuilt.
Normally this is used to speed up partial rebuilds of the site. This
option implies force_output.
Run more quickly, but take more risks. Normally, dynamic content, such as Perl
sections, sitemaps, or navigation links, are always considered to be in need of
rebuilding, as mapping their dependencies is often very difficult or
impossible. This switch forces them to be ignored for dependency-tracking
purposes, and so an output file that depends on them will not be rebuilt unless
a normal content item on that page changes.
Finish with a WebMake object and dispose of its internal open files etc.
Returns the number of serious failure conditions that occurred (files that
could not be created, etc.).
These functions allow code embedded in a <{perl}> or <{perlout}> section of a
WebMake file to be used to script the generation of content.
Each of these functions is defined both as a standalone function, or as a
function on the PerlCode object. Code in one of the <{perl*}> sections can
access this PerlCode object as the $self variable. If you plan to use
WebMake from mod_perl or in a threaded environment, be sure to call them as
methods on $self.
Find all items of content that match the glob pattern $pattern. If
$pattern begins with the prefix RE:, it is treated as a regular
expression. The list of items returned is not in any logical order.
Find all items of content that match the glob-style pattern $pattern. The
list of items returned is ordered according to the sort string $sortstring.
If $pattern begins with the prefix RE:, it is treated as a regular
expression.
See ''sorting.html'' in the WebMake documentation for details on sort strings.
This, by the way, is essentially implemented as follows:
Get the item of content named, but in Perl list format. It is assumed that the
list is stored in the content item in whitespace-separated format.
Note that you may have to assign this list to an array, to force it to be
interpreted by perl as an array instead of as a scalar. This is annoying,
but seems unavoidable.
Set a content chunk to a list containing the values provided, separated by
spaces. This content will not appear in a sitemap, and navigation links will
never point to it.
Set a content chunk to the value provided. This content will appear in a
sitemap and the navigation hierarchy. $upname should be the name of it's
parent content item. This item must not be metadata, or other
dynamically-generated content; only first-class mapped content can be used.
Find all URLs (from <out> and <media> tags) whose name matches the glob-style
pattern $pattern. The names of the URLs, not the URLs themselves, are
returned. If $pattern begins with the prefix RE:, it is treated as a
regular expression.
Generate a list by iterating through the @namelist, setting the content item
item to the current name, and interpreting the content chunk named
$itemname. This content chunk should refer to PerlCodeLibrary.pm appropriately.
Each resulting block of content is appended to a $listtext, which is finally
returned.
See the news_site.wmk sample site for an example of this in use.
Define a tag for use in content items. Any occurrences of this tag, with at
least the set of attributes defined in @required_attributes, will cause the
handler function referred to by handlerfn to be called.
Handler functions are called as fcllows:
handler ($tagname, $attrs, $text, $perlcode);
Where $tagname is the name of the tag, $attrs is a reference to a hash
containing the attribute names and the values used in the tag, and $text is the
text between the start and end tags.
$perlcode is the PerlCode object, allowing you to write proper object-oriented
code that can be run in a threaded environment or from mod_perl. This can be
ignored if you like.
Define a tag for use in content items. This is identical to define_tag above,
but is intended for use to define ''empty'' tags, ie. tags which occur alone,
not as part of a start and end tag pair.
The handler in this case is called with an empty string for the $text
argument.
Get the content object representing the ''root'' of the site map. Returns
undef if no root object exists, or the WebMake file does not contain a
<sitemap> command.
Get the ''main'' content on the current output page. The ''main'' content is
defined as the most recently referenced content item which (a) is not generated
content (perl code, sitemaps, breadcrumb trails etc.), and (b) has its
map attribute set to ``true''.
Note that this API should only be called from a deferred content reference;
otherwise the ''main'' content item may not have been referenced by the time
this API is called.
undef is returned if no main content item has been referenced.
Get the current WebMake interpreter's instance of HTML::WebMake::Main
object. Virtually all of WebMake's functionality and internals can be accessed
through this.
Get a path to a temporary file in the WebMake ~/.webmake directory.
Useful for plugins. You should provide a string to use in the filename
as a clue to the tag type, e.g. ``freetable'', ``thumbnail'' etc.; and
you should provide the extension to use on the file, e.g. ``html'', ``txt'',
``gif'' etc.
''Scrape'' a block of HTML or XML text. Given the text in $text, and
regular expressions in qr/start/ and qr/end/, this function will remove
all HTML up to and including the start regexp, and all HTML including and
after the end regexp.
If $keepstart or $keepend is set to 1, then the text matched by that
regexp will be preserved, otherwise it will be stripped. The default values
are 0.
If the patterns match halfway through a HTML or XML tag, then the remainder of
that tag (until the trailing > character) will be stripped automatically.
If a regexp is specified as undef, then it will be ignored.
Given the text in $text, and regular expressions in qr/start/ and
qr/end/, this function will remove all HTML after, and including, the start
regexp, and all HTML up to and including the end regexp.
If $keepstart or $keepend is set to 1, then the text matched by that
regexp will be preserved, otherwise it will be stripped. The default values
are 0.
If the patterns match halfway through a HTML or XML tag, then the remainder of
that tag (until the trailing > character) will be stripped automatically.
The regexps cannot be specified as undef, as scrape_xml() should
be used for that case instead.
WebMake is a simple web site management system, allowing an entire site to be
created from a set of text and markup files and one WebMake file.
It requires no dynamic scripting capabilities on the server; WebMake sites can
be deployed to a plain old FTP site without any problems.
It allows the separation of responsibilities between the content editors, the
HTML page designers, and the site architect; only the site architect needs to
edit the WebMake file itself, or know perl or WebMake code.
A multi-level website can be generated entirely from 1 or more WebMake files
containing content, links to content files, perl code (if needed), and output
instructions. Since the file-to-page mapping no longer applies, and since
elements of pages can be loaded from different files, this means that standard
file access permissions can be used to restrict editing by role.
Text can be edited as standard HTML, converted from plain text (using the
included Text::EtText module), or converted from any other format by adding a
conversion method to the WebMake::FormatConvert module.
Since URLs can be referred to symbolically, pages can be moved around and URLs
changed by changing just one line. All references to that URL will then change
automatically.
Content items and output URLs can be generated, altered, or read in dynamically
using perl code. Perl code can even be used to generate other perl code to
generate content/output URLs/etc., recursively.
The WebMake file to read and generate output from. If this option is not
supplied, the default behaviour is to search the current directory and its
parents for a file ending in .wmk.
Run more quickly, but take more risks. Normally, dynamic content, such as Perl
sections, sitemaps, or navigation links, are always considered to be in need of
rebuilding, as mapping their dependencies is often very difficult or
impossible. This switch forces them to be ignored for dependency-tracking
purposes, and so an output file that depends on them will not be rebuilt unless
a normal content item on that page changes.
List output files that would be generated to build this site, one per line.
When you're using CVS to replicate a site, this comes in handy, as you know
you can safely overwrite changes in these files when doing a cvs update.
This WebMake Perl library provides a tag to allow HTML tables to be
constructed, quickly, using a tab-, comma-, or pipe-separated value table.
Firstly, pick a delimiter character, such as |. Set the delimiter
attribute to this character.
Each line of the CSV table will become a <TR>; each delimiter-separated cell
will be enclosed in a <TD> tag pair.
Attributes for the HTML table tag itself, can be provided as attributes to this
tag; they will be passed through into the resulting <TABLE> tag.
By default, items inside the tables are represented as <TD> cells, with no
attributes. Certain special line prefixes allow control over formatting of
table items, as follows. These are all case-insensitive, and whitespace after
them will be stripped; but they must start on the first character of the line
(no leading spaces), and, despite how they're rendered here, should not contain
any spaces between the angle brackets.
The rest of the line is used to specify the format to be used for each line
afterwards, until the end of the <csvtable>, or until the next <csvfmt>
line.
The line should end in a </csvfmt> closing tag.
Specify a <tr>...<tr> block, with $1, $2, $3, etc. for the numbered cells
(counting from 1). For example:
This content contains a dump of all content items defined, including their
names and their values. It excludes $ {DumpVars_full} and
$ {DumpVars_names}.
navtree operates similarly to the sitetree tag, but displays only a
subset of all the site's nodes; it will map all of the top-level nodes of the
site, the parent nodes of the current page, their direct children, and the
current page plus it's children up to depth depth. The effect is similar to
a tree-view-based file browser, like Windows Explorer.
This differs from the sitetree tag in that sitetree does not support
displaying the current page's children.
Display of each page's entry in the tree is performed by expanding one of the 5
template content items named in the tag's attributes: closednode,
opennode, thisnode, thisleaf or leaf. See the sitemap tag
documentation for more details on how to use these (note however that the
is_node variable is not available for sitetrees).
The name of the sitemap. The sitetree requires a sitemap, as the sitemap is
responsible for mapping out the site and defining which pages and content items
are included.
A content item which is evaluated to display an ''open'' node, one which is on
the path to the current page. As for the sitemap tag's node attribute,
this content item must include a reference to the list variable, which will
contain all the entries for the pages beneath it in the hierarchy.
A content item which is evaluated to display an ''open'' root node. It
defaults to opennode if not specified. It may be used to generate
''multirooted'' tree (a forest). In that case you should create a dummy
root content (it upsets sitemap code if you dont have one single root) and
create rootnode template to output only the list with apropriate
decorations.
A content item which is evaluated to display the current page if it is an
inner node, that is it has children. Iff depth 0, thisnode must include
a reference to the list variable.
How many levels beneath the current page should be listed. 0 means none
(behavior of sitetree tag). The default is 1 which means to list direct
children of the current node.
This WebMake library provides an XSL stylesheet, which allows you to include
RSS feeds directly into your HTML documents.
It doesn't matter what version of RSS is used in the item named in the rss
parameter, rssbox supports RSS 0.9, 0.91 and 1.0.
Note that you also need to include a LINK or STYLE block which contains
the rss2html.stylesheet_text content item, in order to set the CSS styles
used by the output HTML.
It doesn't matter what version of RSS is used in the rss parameter,
rssbox supports RSS 0.9, 0.91 and 1.0.
The XSL stylesheet used was originally written by Michael Claßen, for
WebReference.com. It's been updated with some more XSL from Eric van der
Vlist's stylesheet on 4xt.org, to support RSS 1.0, and Eric's converter
stylesheets are used to support 0.9 and 0.91.
The following template items are predefined by this plugin, and can be
overridden to change the output. The default setting is listed beside the
template's name.
This WebMake Perl library provides a way to ``make safe'' WebMake, EtText or HTML
data, escaping all metacharacters appropriately so that content references,
EtText links or HTML tags are not interpreted.
This WebMake Perl library provides the sitetree tag.
Sitetree operates similarly to the built-in sitemap tag, but, displays
only a subset of all the site's nodes; it will map all of the top-level nodes
of the site, and then only the parent nodes of the current page. The effect is
similar to a tree-view-based file browser, like Windows Explorer.
In terms of differences in usage, where sitemap creates a single map which
includes every page in the site, sitetree maps only the pages up to and
including the current page, and generates a map for each individual output
page.
Display of each page's entry in the tree is performed by expanding one of the 4
template content items named in the tag's attributes: closednode,
opennode, thispage, or leaf. See the sitemap tag documentation for
more details on how to use these (note however that the is_node variable
is not available for sitetrees).
The name of the sitemap. The sitetree requires a sitemap, as the sitemap is
responsible for mapping out the site and defining which pages and content items
are included.
A content item which is evaluated to display an ''open'' node, one which is on
the path to the current page. As for the sitemap tag's node attribute,
this content item must include a reference to the list variable, which will
contain all the entries for the pages beneath it in the hierarchy.
This WebMake Perl library provides a quick shortcut to make thumbnail links to
full-sized images, suitable for use in a photo album site or similar.
The library provides support for a <thumbnail> tag, which creates a thumbnail
of one image, and some helper functions for creating thumbnail pages with lots
of images.
The attributes supported by the <thumbnail> tag are as follows:
If you wish to draw a border around the images, this specifies the border width
(in pixels). The default value is 1. This can also be specified by setting
a template content item called thumbnail.borderwidth.
The border colour to draw image borders in. The default value is ``black'' (or
#000000). This can also be specified by setting a template content item
called thumbnail.bordercolor.
The template text to be used for the thumbnail link and img tags. The
following content items are defined for use inside the template text. This can
also be specified by setting a template content item called
thumbnail.template.
This function will lay out a table containing thumbnails, with up to
$pics_per_row pictures on each row. The following template content items
can be set to customise the behaviour of this tag:
The template used to wrap each thumbnail. References to $
{thumbnail.table.item} will be replaced with the output from the <thumbnail>
tag itself. Default setting:
The template used to wrap each row of thumbnails. References to $
{thumbnail.table.tds} will be replaced with the output from the $
{thumbnail.table.td} templates so far for this row. Default setting:
<tr> $ {thumbnail.table.tds} </tr>
Note that you will have to wrap this up in a <table> tag yourself ;)
This WebMake Perl library provides the wwwtable tag. This is a useful way
to lay out HTML tables, using an more intuitive addressing system: instead of
listing all table entries, one by one, left to right and top to bottom, it
allows you to randomly, and flexibly, pick cells and define what goes into
them.
It's currently implemented using Tomasz Wegrzanowski's freetable package.
This package must be installed for this tag to be used; it can be downloaded
from
HTML is great language, but have one horrible flaw :
tables. I spent many hours looking at HTML source I just written
and trying to guess which cell in source is which in browser.
If this also describes you, then read this manpage and your
pain will stop.
Program read HTML source from either stdin or file (WebMake note: the HTML
source is read from between the <wwwtable> tags in the WebMake
content). Then it searches for line starting table:
<wwwtable [options]>
Then it analyzes table, put correct HTML table in this place and
continue searching for the next table.
wwwtable_options will be passed to <table> tags. There is
no magic inside preamble. It can be any HTML text. It will be simply
put in front of table.
cell is either normal_cell (<td> tag) or
header_cell (<th> tag).
At least it was this way in freetable 1.x.
See the next section for alternative cell address syntax.
cell_options will be passed to cell tag. There is magic inside
colspan and rowspan keys are parsed to make correct table.
cell_content can be anything. It may contain text, tags, and
even nested wwwtables.
row and col are either numbers locating cells, expressions relative to previous
cell or regular expresions to match few of them. Unlike wwwtable,
freetable can use regular expresions for header cells. Also * can be
used, and it mean .* really.
Relative expressions are :
= or empty means : the same as previous
+ or +X means : one and X more than previous
- or -X means : one and X less than previous
If many definisions adress the same cell all options and contents are
concatenated in order of apperance.
If you want to use only regular expresions you must tell
program about the last cell :
    <wwwtable>
    (*,1)
    these are colums 1
    (1,*)
    these are rows 1
    (4,4)
    </wwwtable>
It is inconvenient to specify cell address as regular expression.
So in freetable 2.0 two new methods were introduced.
Both can be used to either normal or header cells.
Full bakward compatibility is preserved.
To preserve it, new syntax had to be introduced.
Unfortunatelly, you can't specify row
address using one method, and column address using another.
To come around this, both new methods are very liberal
and allow you to use =, +, -, +X-X and null
string with the same meaning as they have in old addressing
method.
Unlike regular expression method,
new methods will find out the last cell automatically.
Syntax for both rowrange and colrange is like: 1-2,4-7,9,12.
Duplicates will be eliminated. For purpose of relative addresses
last given number is used. So if you write
    (1-100,32;1)
    foo
    (+,)
    bar
Cell (33,1) will contain `foobar' and all others only `foo'.
    ({code for rows},{code for tables}) cell_options
    cell_content
You can use arbitrary Perl one-liner as long as it matches our
not very intelligent regular expressions and evaluates to list.
Unfortunatelly there isn't any regular expression for Perl code,
but as long as it doesn't contain },{ and }) it should work.
Example:
Will evaluate to 100 rows x 4 columns table with `foo' in
every 1st, 2nd and 4th column of every row with number equal 1 modulo 3.
If you want to use ``arbitrary code'' in one part of address and
explicit range in the other, change - into .. in defenition of
range, and put in between { and }.
If you want to use ``arbitrary code'' in one part of address and
regular expression in the other, you have to write
{grep {/expression/} from..to}.
Unfortunatelly, in this case you have to specify size of the table explicitely.
If you was formerly user of wwwtable and want to change your tool, you
should read this. Most of this is about regexps handling.
Notice also that wwwtable couldnt do location tags substitution nor macroprocesing.
Option -w has completely oposite meaning. We dont print warnings by default,
and -w or --warning is used to force warnings.
Table header fields can be specified by regexps ex :
((1,*))
It was impossible in wwwtable.
Axis counters are 100% orthogonal. This mean that code :
This WebMake Perl library provides the xsl WebMake tag, allowing you to
apply the named XSL stylesheet to the named XML data, rendering the output in
place of the tag.
The named items should be defined as WebMake content or template items of
format text/xml, in order to use dependency information correctly.
XSL parameters may be passed in using attributes.
Note that the Perl module XML::Sablotron is required.